YOUNG INNOVATORS CHALLENGE DEVELOPMENT ENVIRONMENT SETUP GUIDE
The long story short is that we need a few tools before we can start coding.
If you missed the setup in Session 1, or something broke along the way, don’t worry. This guide will get you back on track from scratch.
We only need four things: VS Code (where we write code), uv (which handles Python for us), git (which tracks our changes), and a GitHub account (where our code lives online).
That said, let’s get you set up.
1. INSTALL VS CODE
VS Code is a code editor. In plain English, it’s the app we’ll use to write, edit and run all our code for this course.
Download it from code.visualstudio.com. The site should detect your operating system automatically, so you can click the big download button.
Windows: Run the installer and accept the defaults. We don’t need to change any settings.
Mac: Open the downloaded .zip file. Drag the VS Code app into your Applications folder.
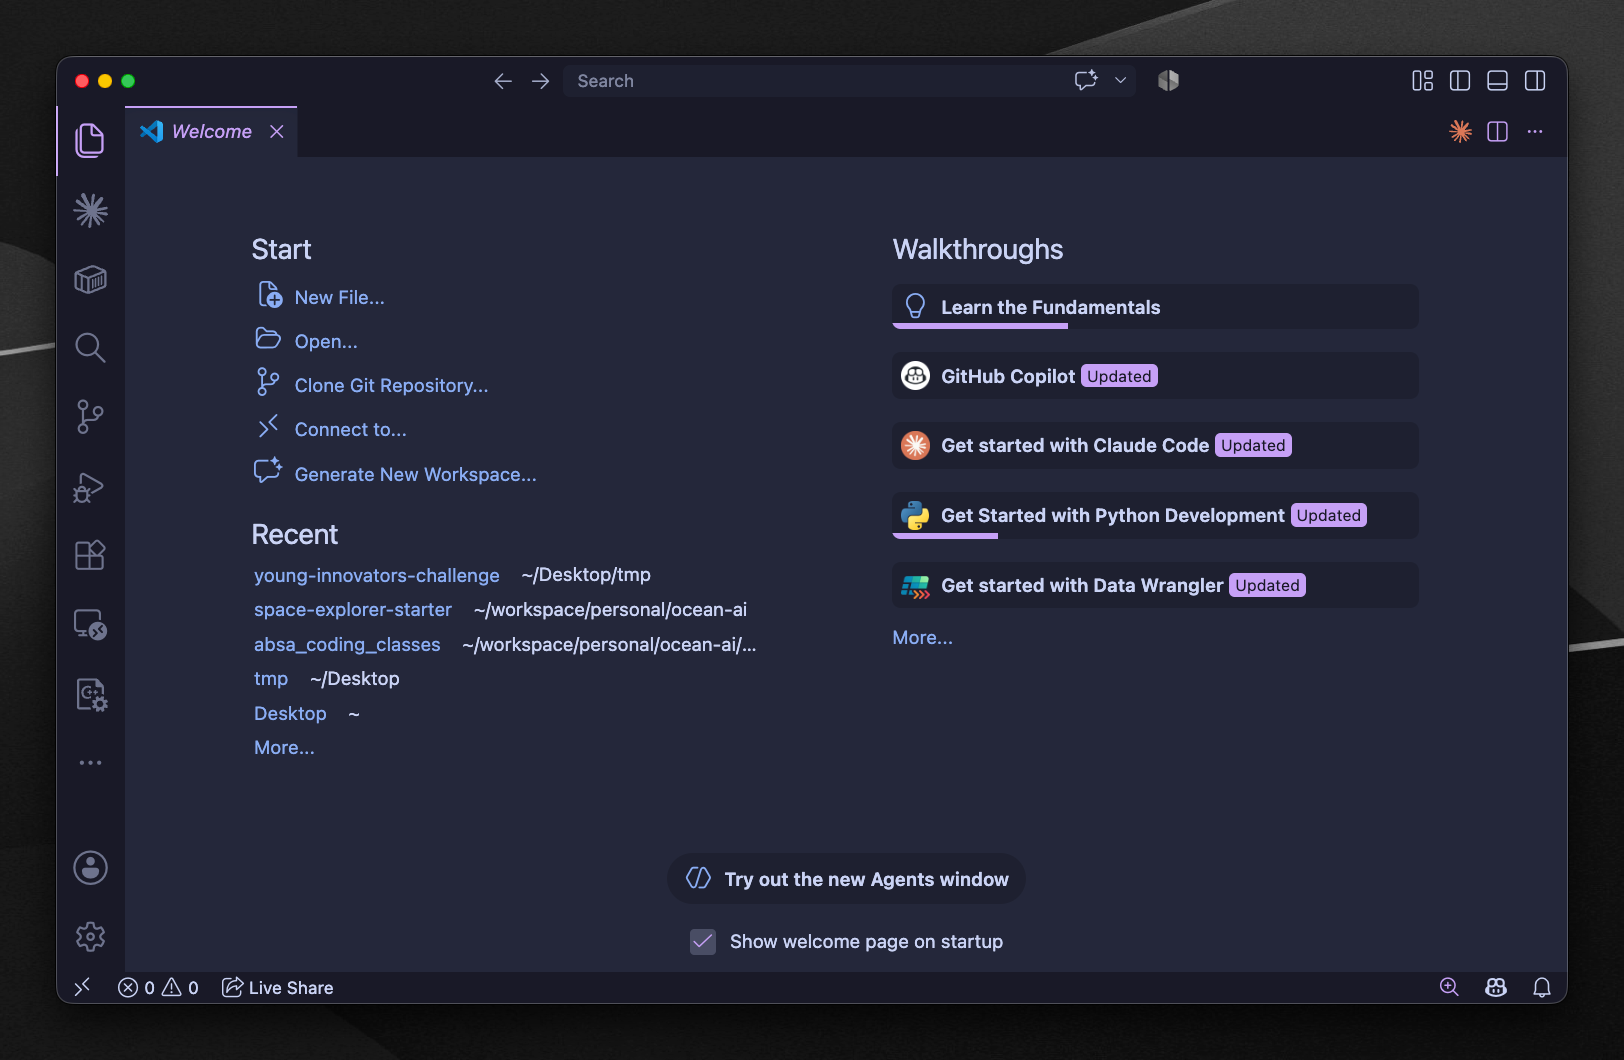
Once that’s done, open VS Code. You should see a welcome tab that looks something like this:
2. INSTALL UV
uv is the tool that installs and manages Python for us. That means you don’t have to install Python separately, which makes life a little easier.
Open a terminal:
- Windows: Press
Win + R, typecmd, press Enter. - Mac: Press
Cmd + Space, typeTerminal, press Enter.
Then copy and paste the install command for your system.
Windows:
1
 powershell -ExecutionPolicy ByPass -c "irm https://astral.sh/uv/install.ps1 | iex"
Mac:
1
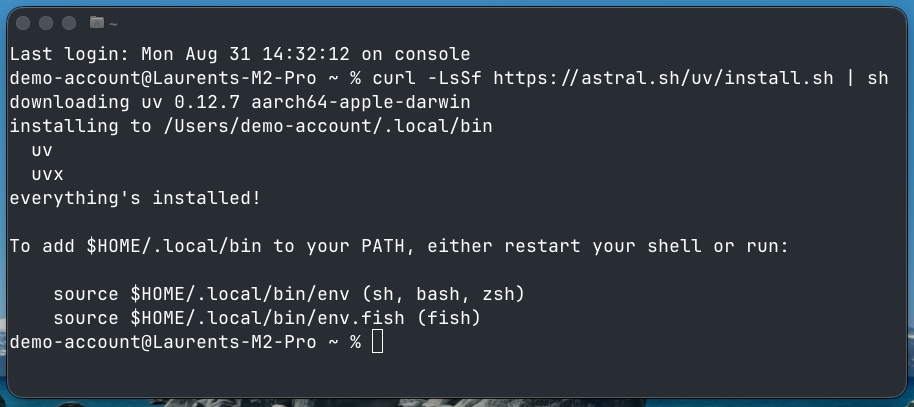
 curl -LsSf https://astral.sh/uv/install.sh | sh
READ THE OUTPUT
After the install finishes, the terminal will print a few lines. Read them. On Mac, you’ll probably see a message telling you to restart your terminal or run a command to update your PATH.
What is PATH? Your computer keeps a list of folders where it looks for programs. That list is called PATH. When you install something new, it sometimes needs to be added to the list. If it isn’t, your computer won’t find the program, even though the program is installed.
If the output tells you to restart your terminal, close the terminal window and open a new one.
I’m emphasising this because it is easily the most common issue we see.
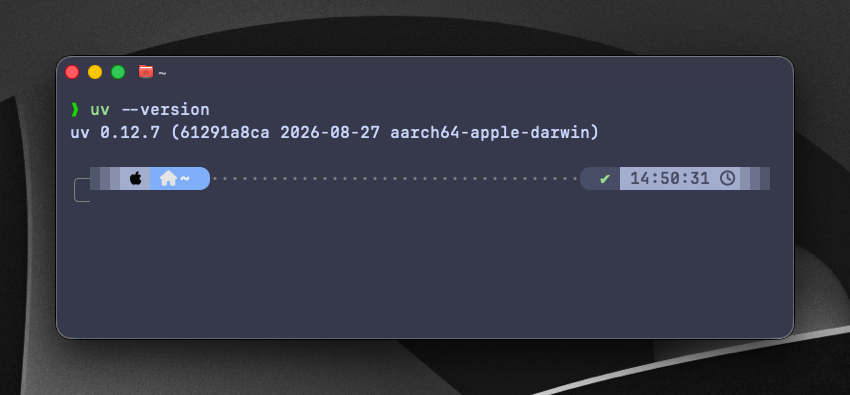
To confirm uv is working, run:
1
 uv --version
You should see a version number. If you get “command not found”, your terminal hasn’t picked up the PATH change. Close it and open a fresh one.
And that’s uv sorted.
3. INSTALL GIT
git is version control software. It saves snapshots of your code so you can track what changed, go back when something breaks and share your work with other people. Navigate to the download/install page for git, click on the tab for the operating system on your laptop, and follow the instructions. In my case, I’m on Mac so I’ll be using the terminal commands to download git. More instructions below:
Windows: Download the installer file by clicking on the link that says “Click here to download”. Run the installer and accept all the defaults.
Mac: Open Terminal and run:
1
 xcode-select --install
This installs Apple’s developer tools, which include git. Note that you’ll need about 1GB of free disk space for this, since xcode developer tools include much more than just git - these may be of use to you later. A popup will appear. Click Install and wait for it to finish.
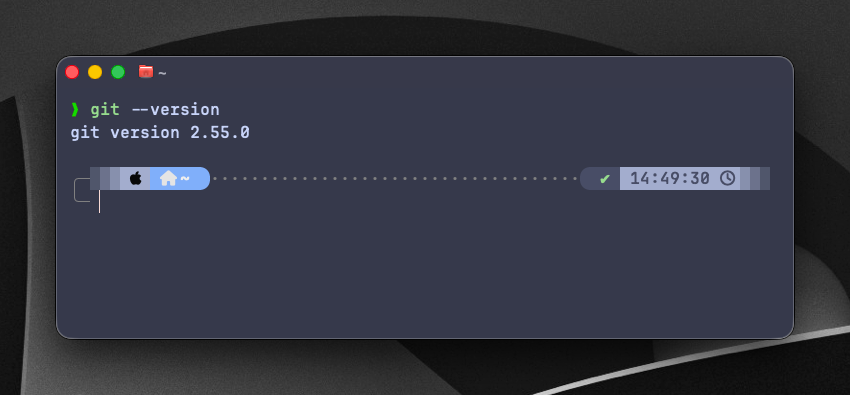
To confirm git is installed, run:
1
 git --version
You should see a version number.
That’s git sorted too.
4. CREATE A GITHUB ACCOUNT
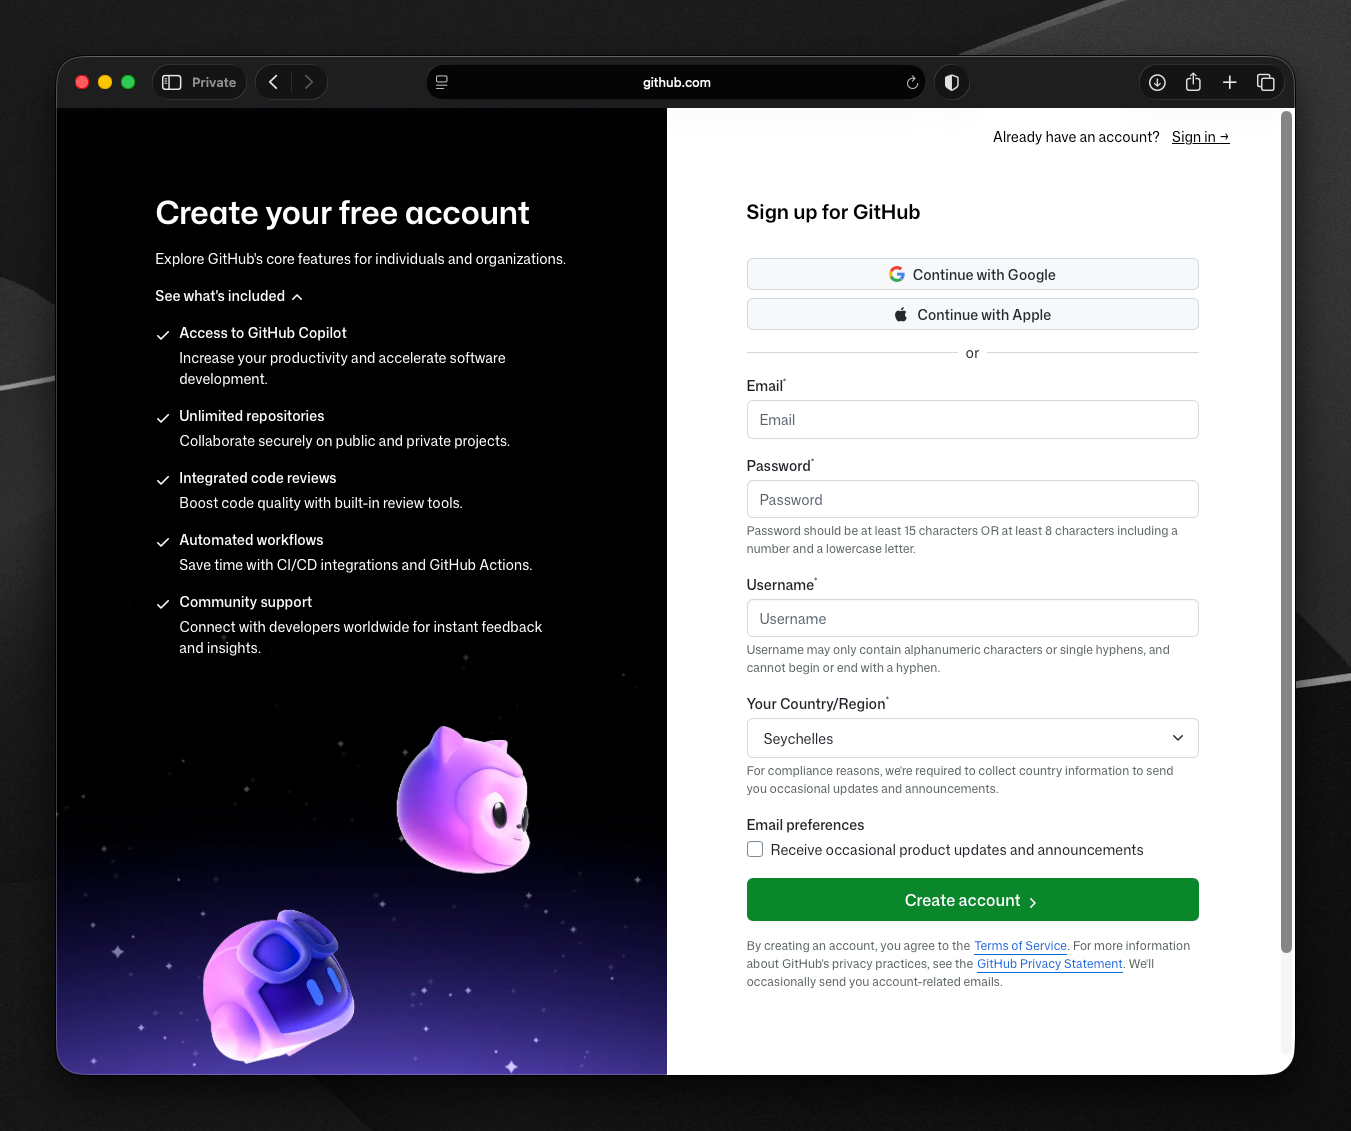
Go to github.com and sign up.
Pick a username you’d be happy to show a future employer. Your GitHub account becomes part of your developer identity, so I’d recommend treating it like a professional profile.
5. OPEN THE TERMINAL IN VS CODE
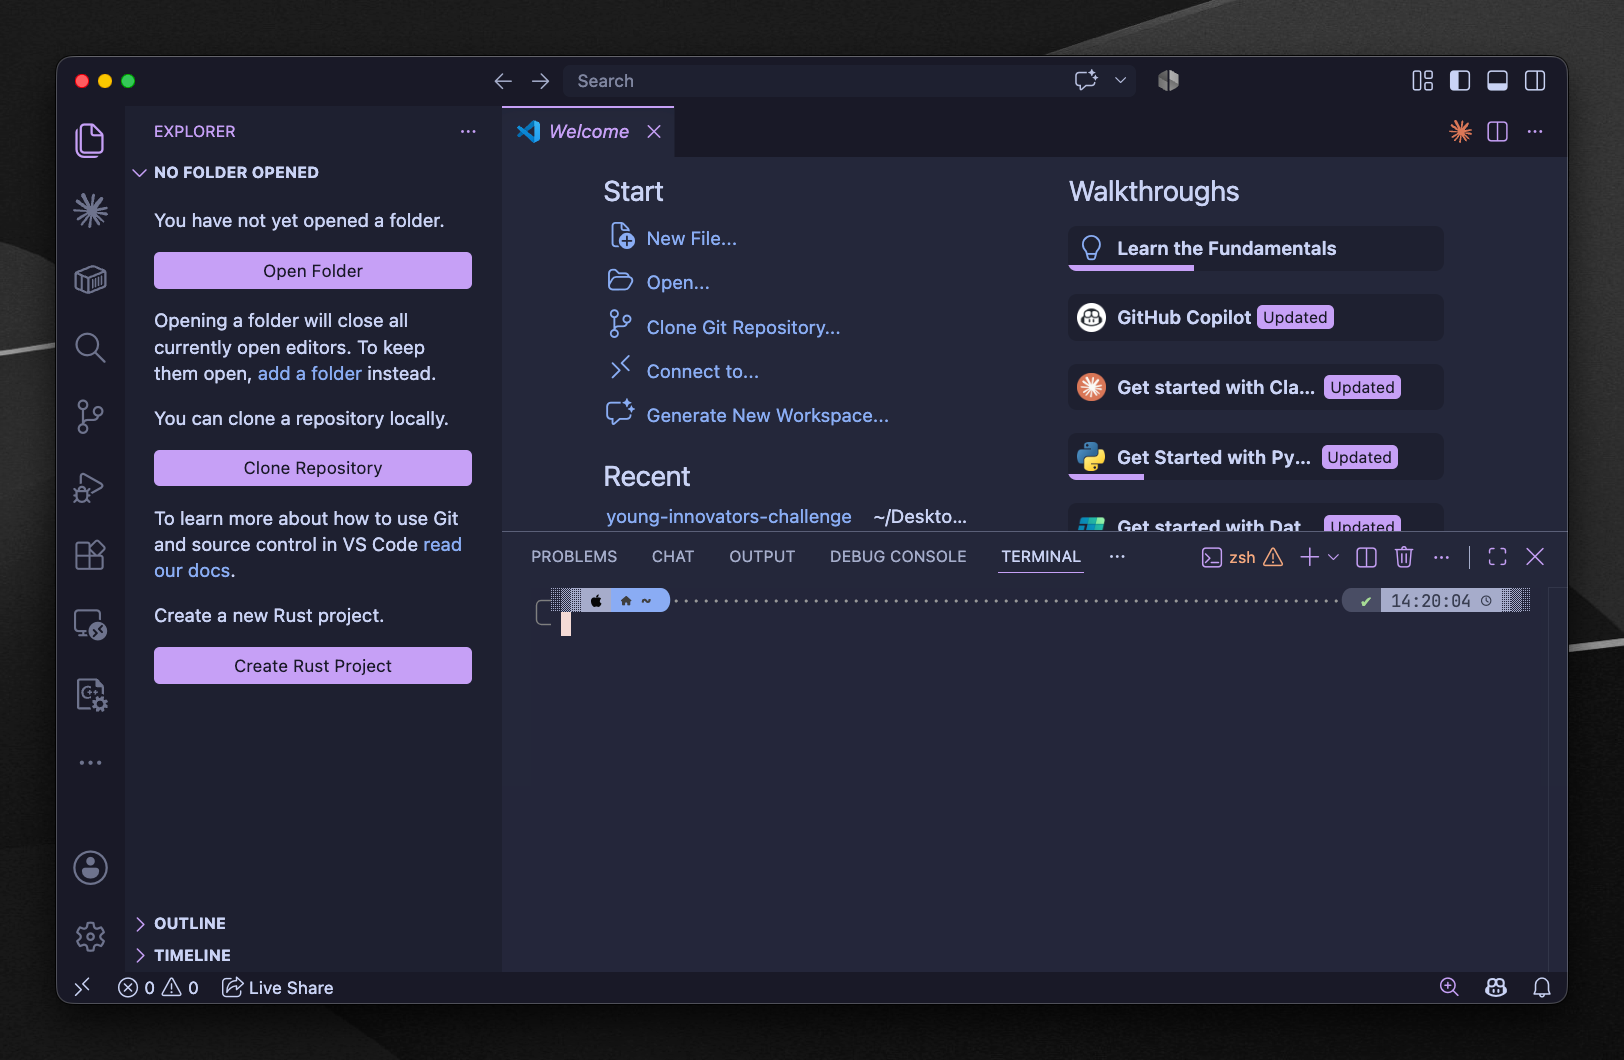
From this point on, we’ll use the terminal inside VS Code instead of keeping a separate terminal window open.
Open VS Code, then:
- Windows/Mac: Press
Ctrl + `(that’s the backtick key, usually above Tab) - Or use the menu: Terminal → New Terminal
A terminal panel should appear at the bottom of the VS Code window. This is where we’ll run all our commands from now on.
6. CLONE THE PROJECT
“Cloning” is just the word git uses for downloading a copy of a project from GitHub to your computer.
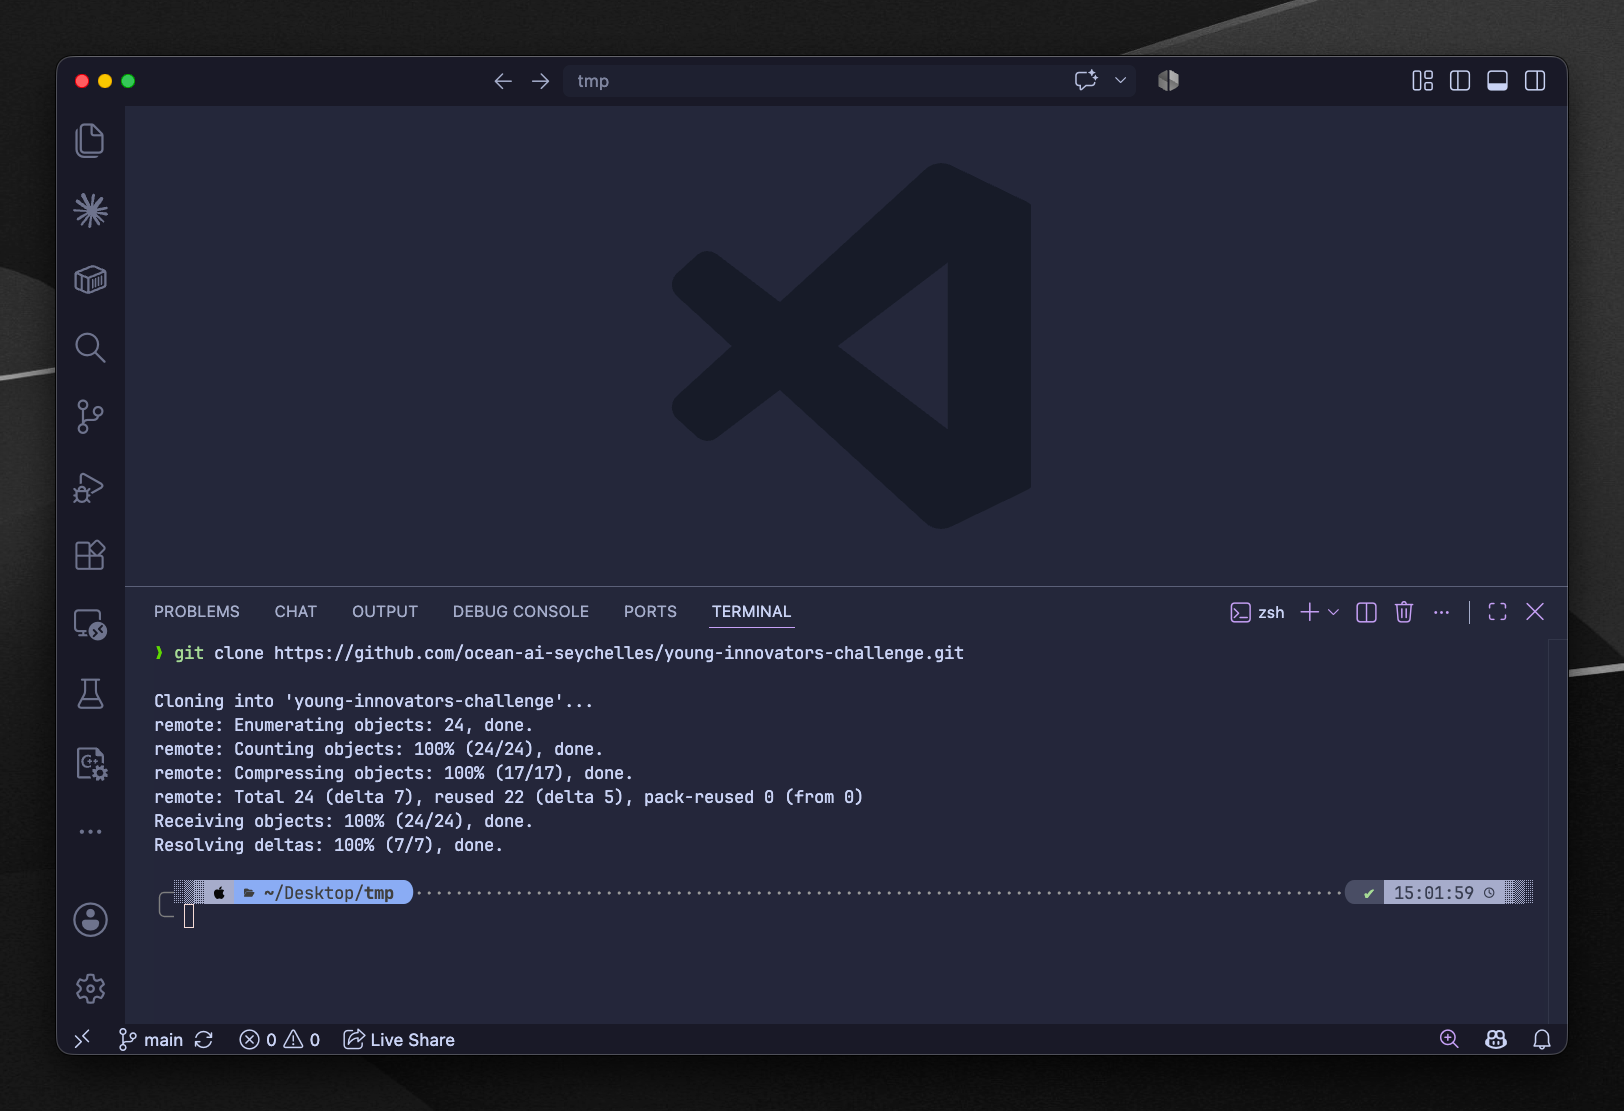
In the VS Code terminal, run:
1
 git clone https://github.com/ocean-ai-seychelles/young-innovators-challenge.git
You’ll see some download progress and, once it’s done, you’ll have a new folder called young-innovators-challenge.
OPEN THE PROJECT FOLDER IN VS CODE
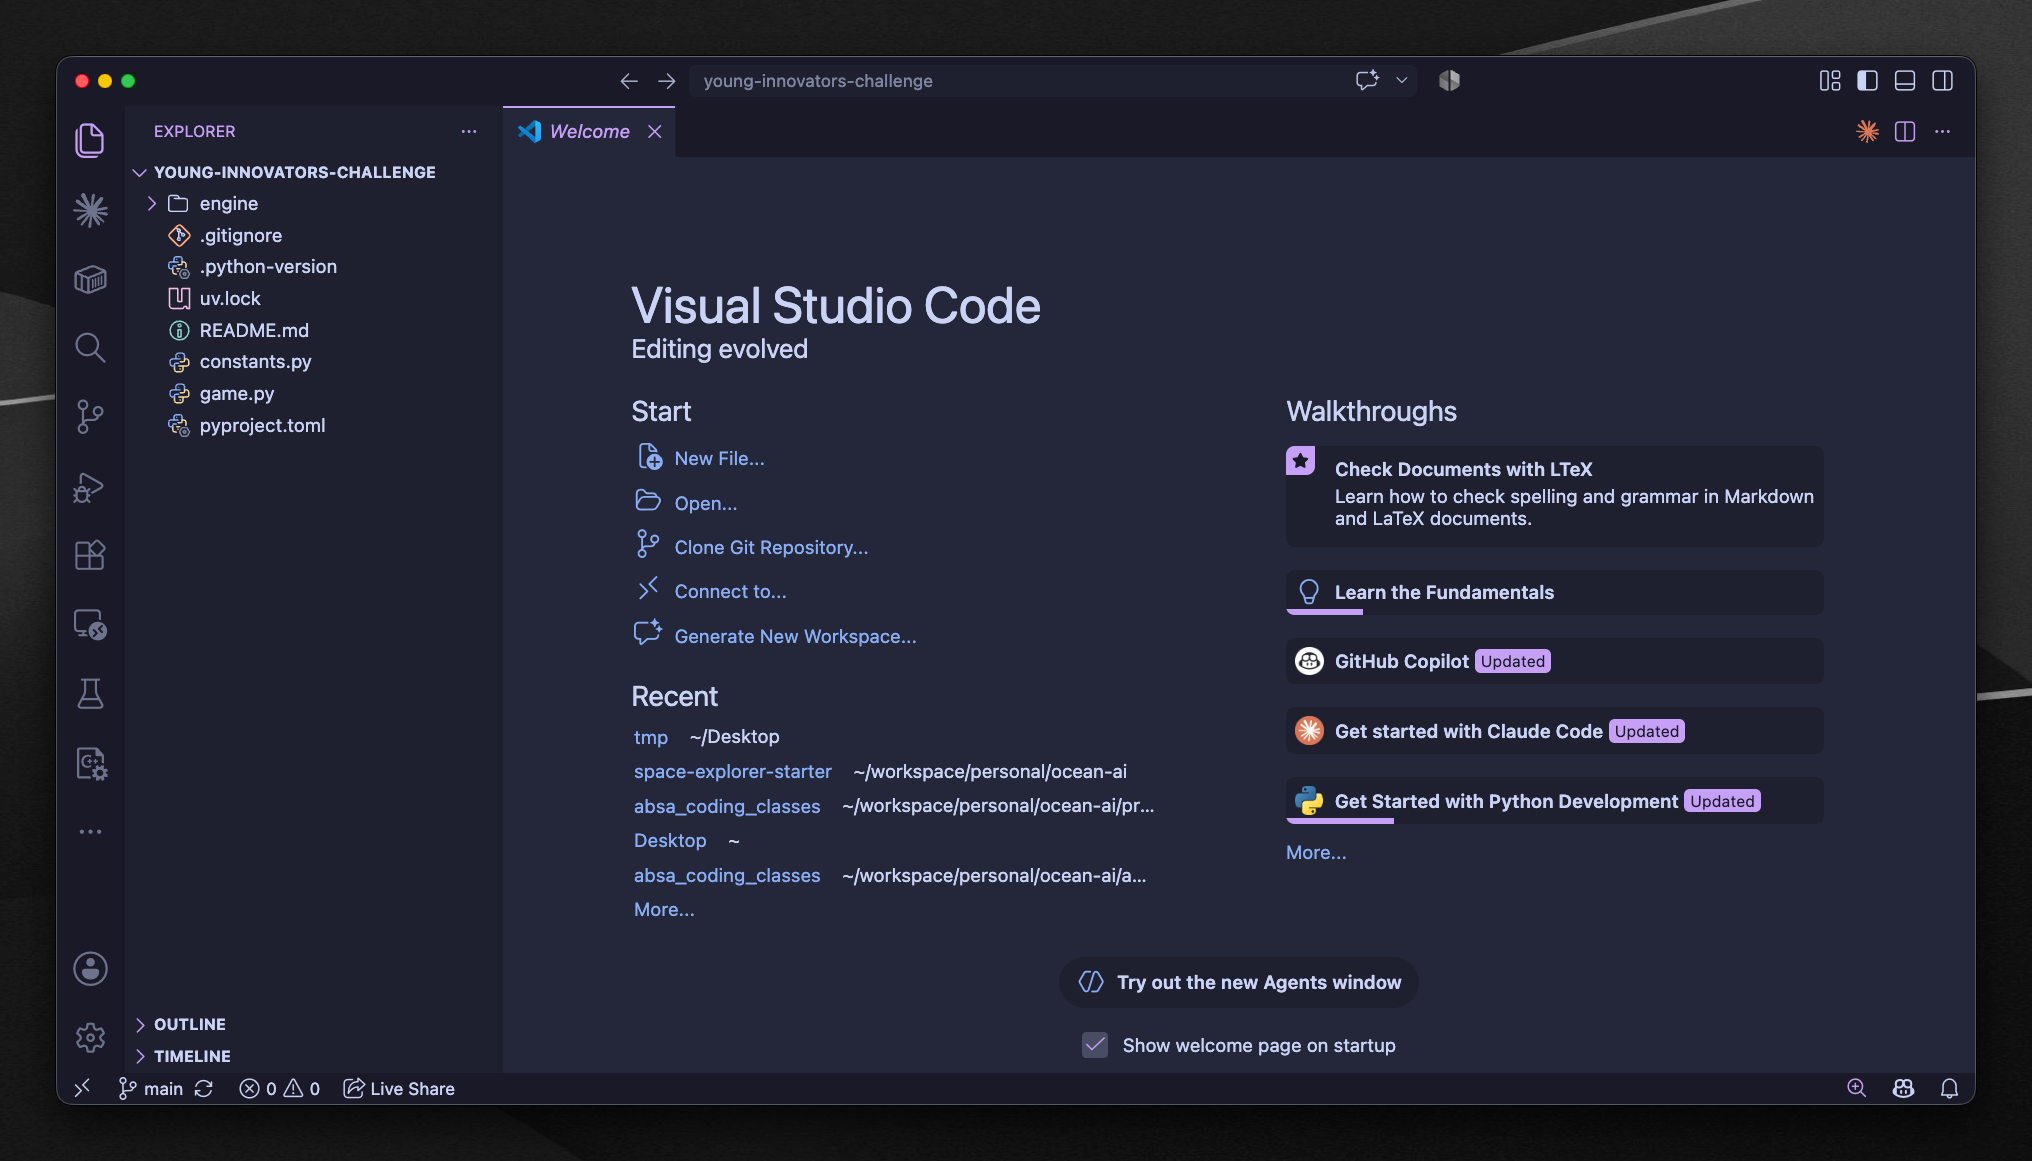
This step is essential. VS Code needs to be “inside” the project folder for everything to work.
- Go to File → Open Folder (Windows) or File → Open… (Mac)
- Navigate to the
young-innovators-challengefolder you just cloned - Select it and click Open
VS Code will reload. You should now see the project files in the Explorer panel on the left, including game.py, constants.py, the engine/ folder and so on.
Why can’t I just start typing commands? When you first cloned the project, VS Code was still pointing at whatever folder it opened in by default. Running
uv run game.pythere would fail because the game files aren’t in that location. Opening the folder tells VS Code, “this is where my project lives.”
This step is easy to miss, so make sure you can actually see those project files before moving on.
7. RUN THE GAME
Open the terminal again (Ctrl + `) and run:
1
 uv run game.py
The first time you run this, uv will download the right version of Python and set everything up. It might take a moment, so let it finish.
Then the game plays itself. You’ll see your ship travel across the galaxy and encounter asteroids, raiders and traders.
You can’t control it yet. That comes in Session 2 😎
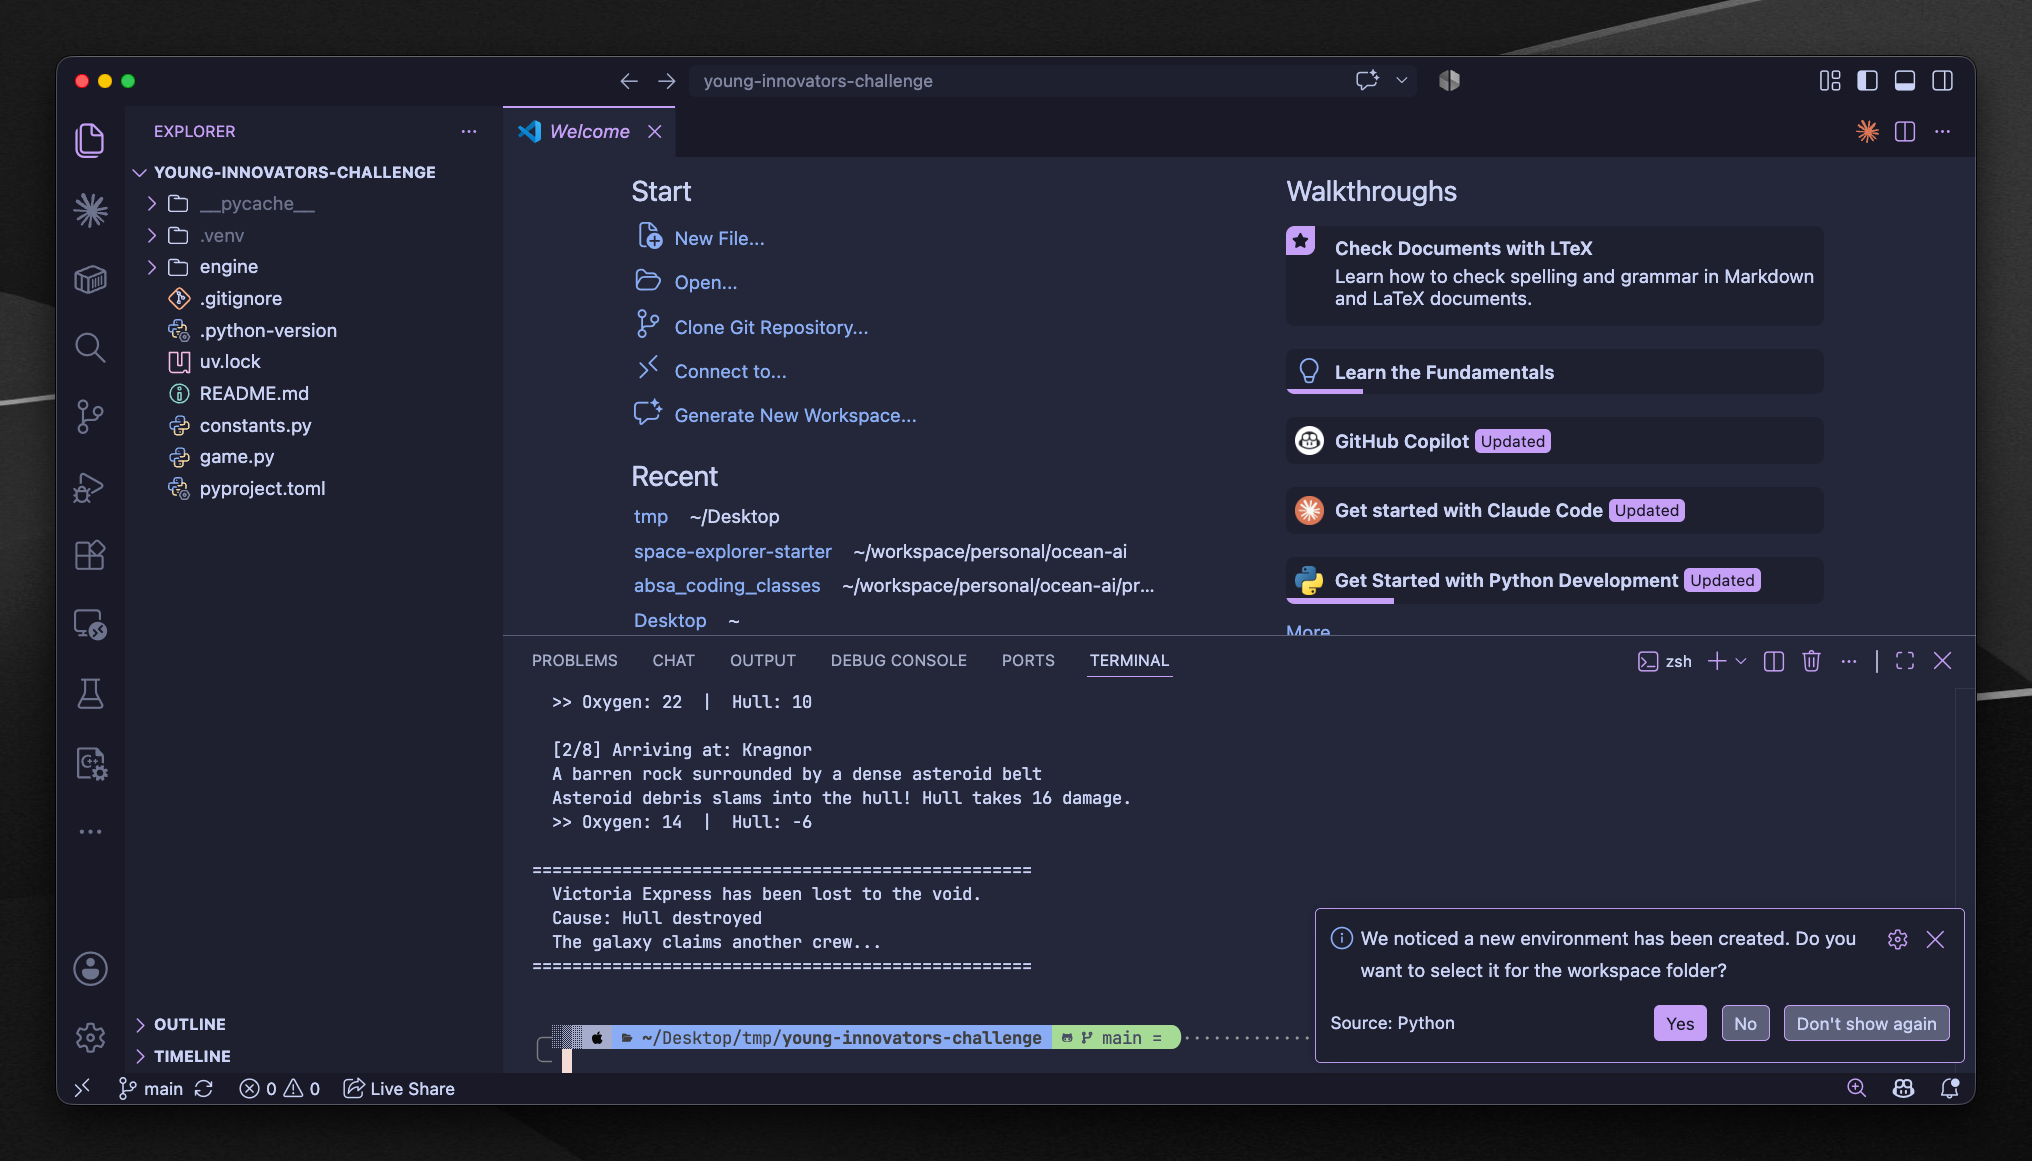
Tip: After editing your code and saving it, you’ll want to run the game again to see your changes. Instead of typing the full command again, press the up arrow key in the terminal. It brings back your last command.
8. SET UP YOUR OWN GITHUB REPOSITORY
Right now, your copy of the project is linked to our class repository. That’s useful for getting started, but you need your own repository if you want to save your work to your own GitHub account.
CREATE A NEW REPO ON GITHUB
- Go to github.com and sign in
- Click the + button in the top-right corner, then New repository
- Name it
young-innovators-challenge(or whatever you like) - Leave it set to Public
- Do not check “Add a README” or any of the other options. The repo must be empty
- Click Create repository
GitHub will then show you a page with some setup instructions. You need the URL it gives you, which will look something like this:
1
 https://github.com/YOUR-USERNAME/young-innovators-challenge.git
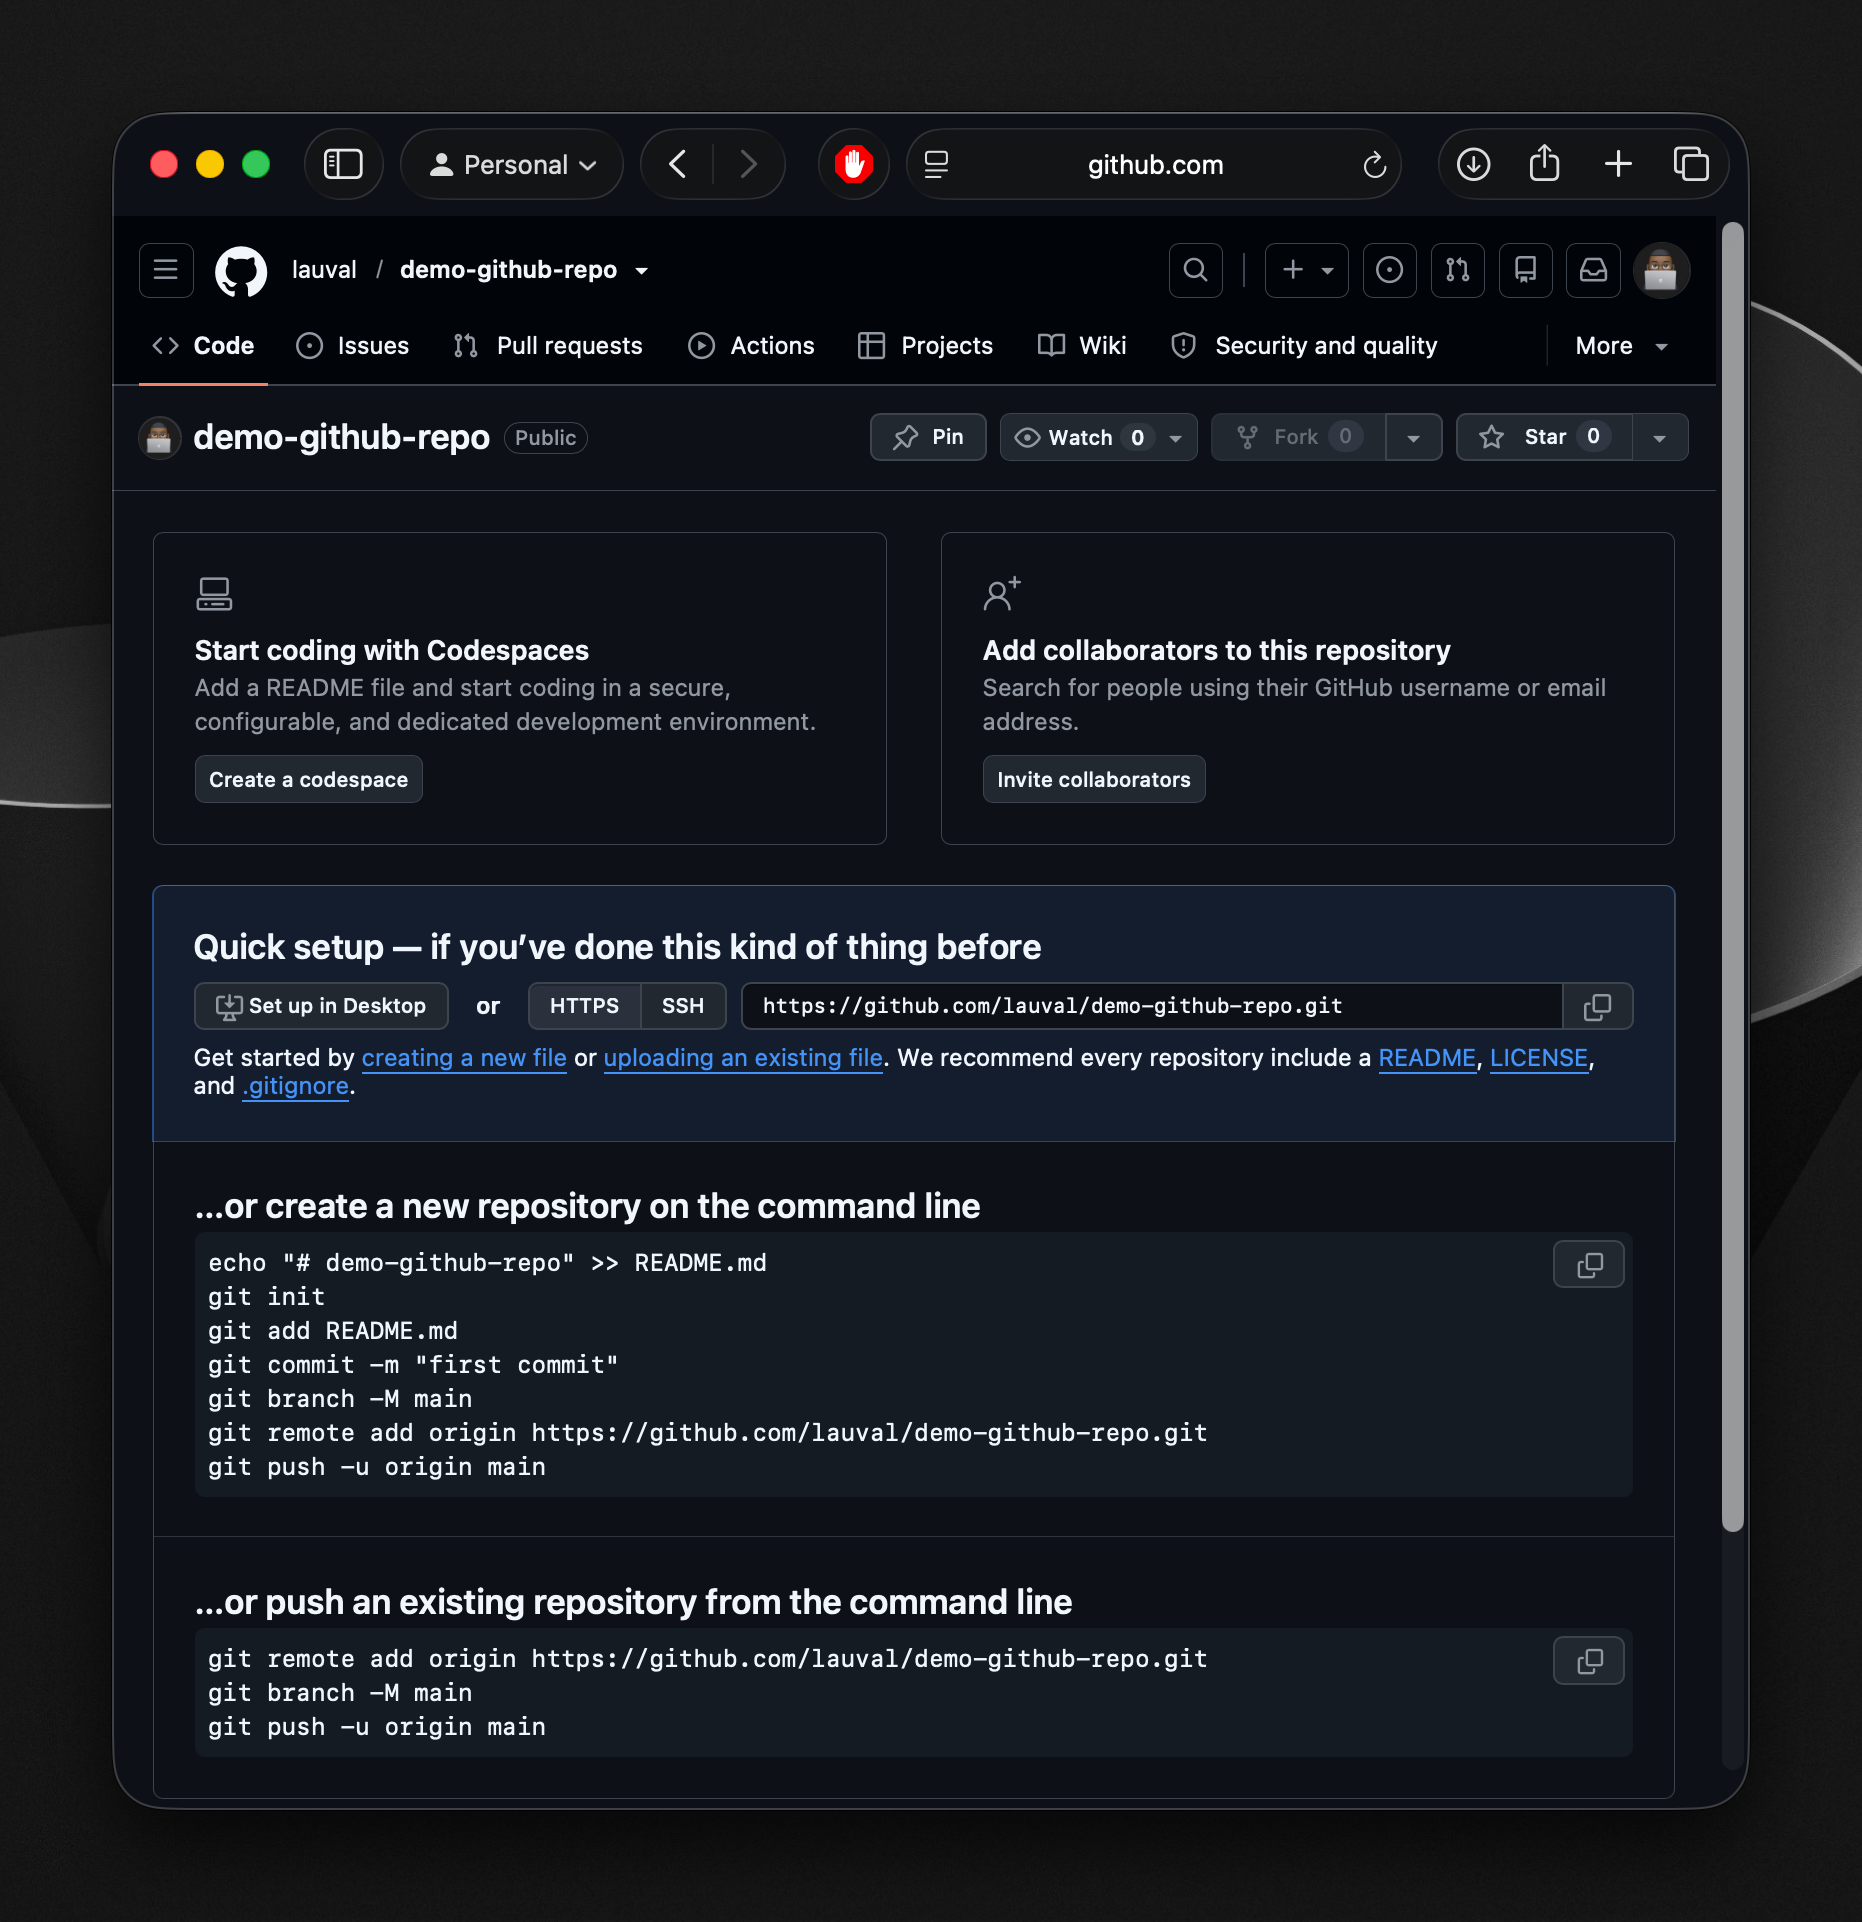
POINT YOUR LOCAL PROJECT TO YOUR REPO
In the VS Code terminal, make sure you’re inside the project folder and then run this command. Remember to replace the example URL with yours.
1
 git remote set-url origin https://github.com/YOUR-USERNAME/young-innovators-challenge.git
This tells git, “when I push my code, send it to my repository, not the class one.”
What I would recommend here is typing out the first part:
1
 git remote set-url origin
Then, go back to the browser, ensuring you’re on the page as seen in the screenshot above, and just copy the url from your browser, see the screenshot below for mine.
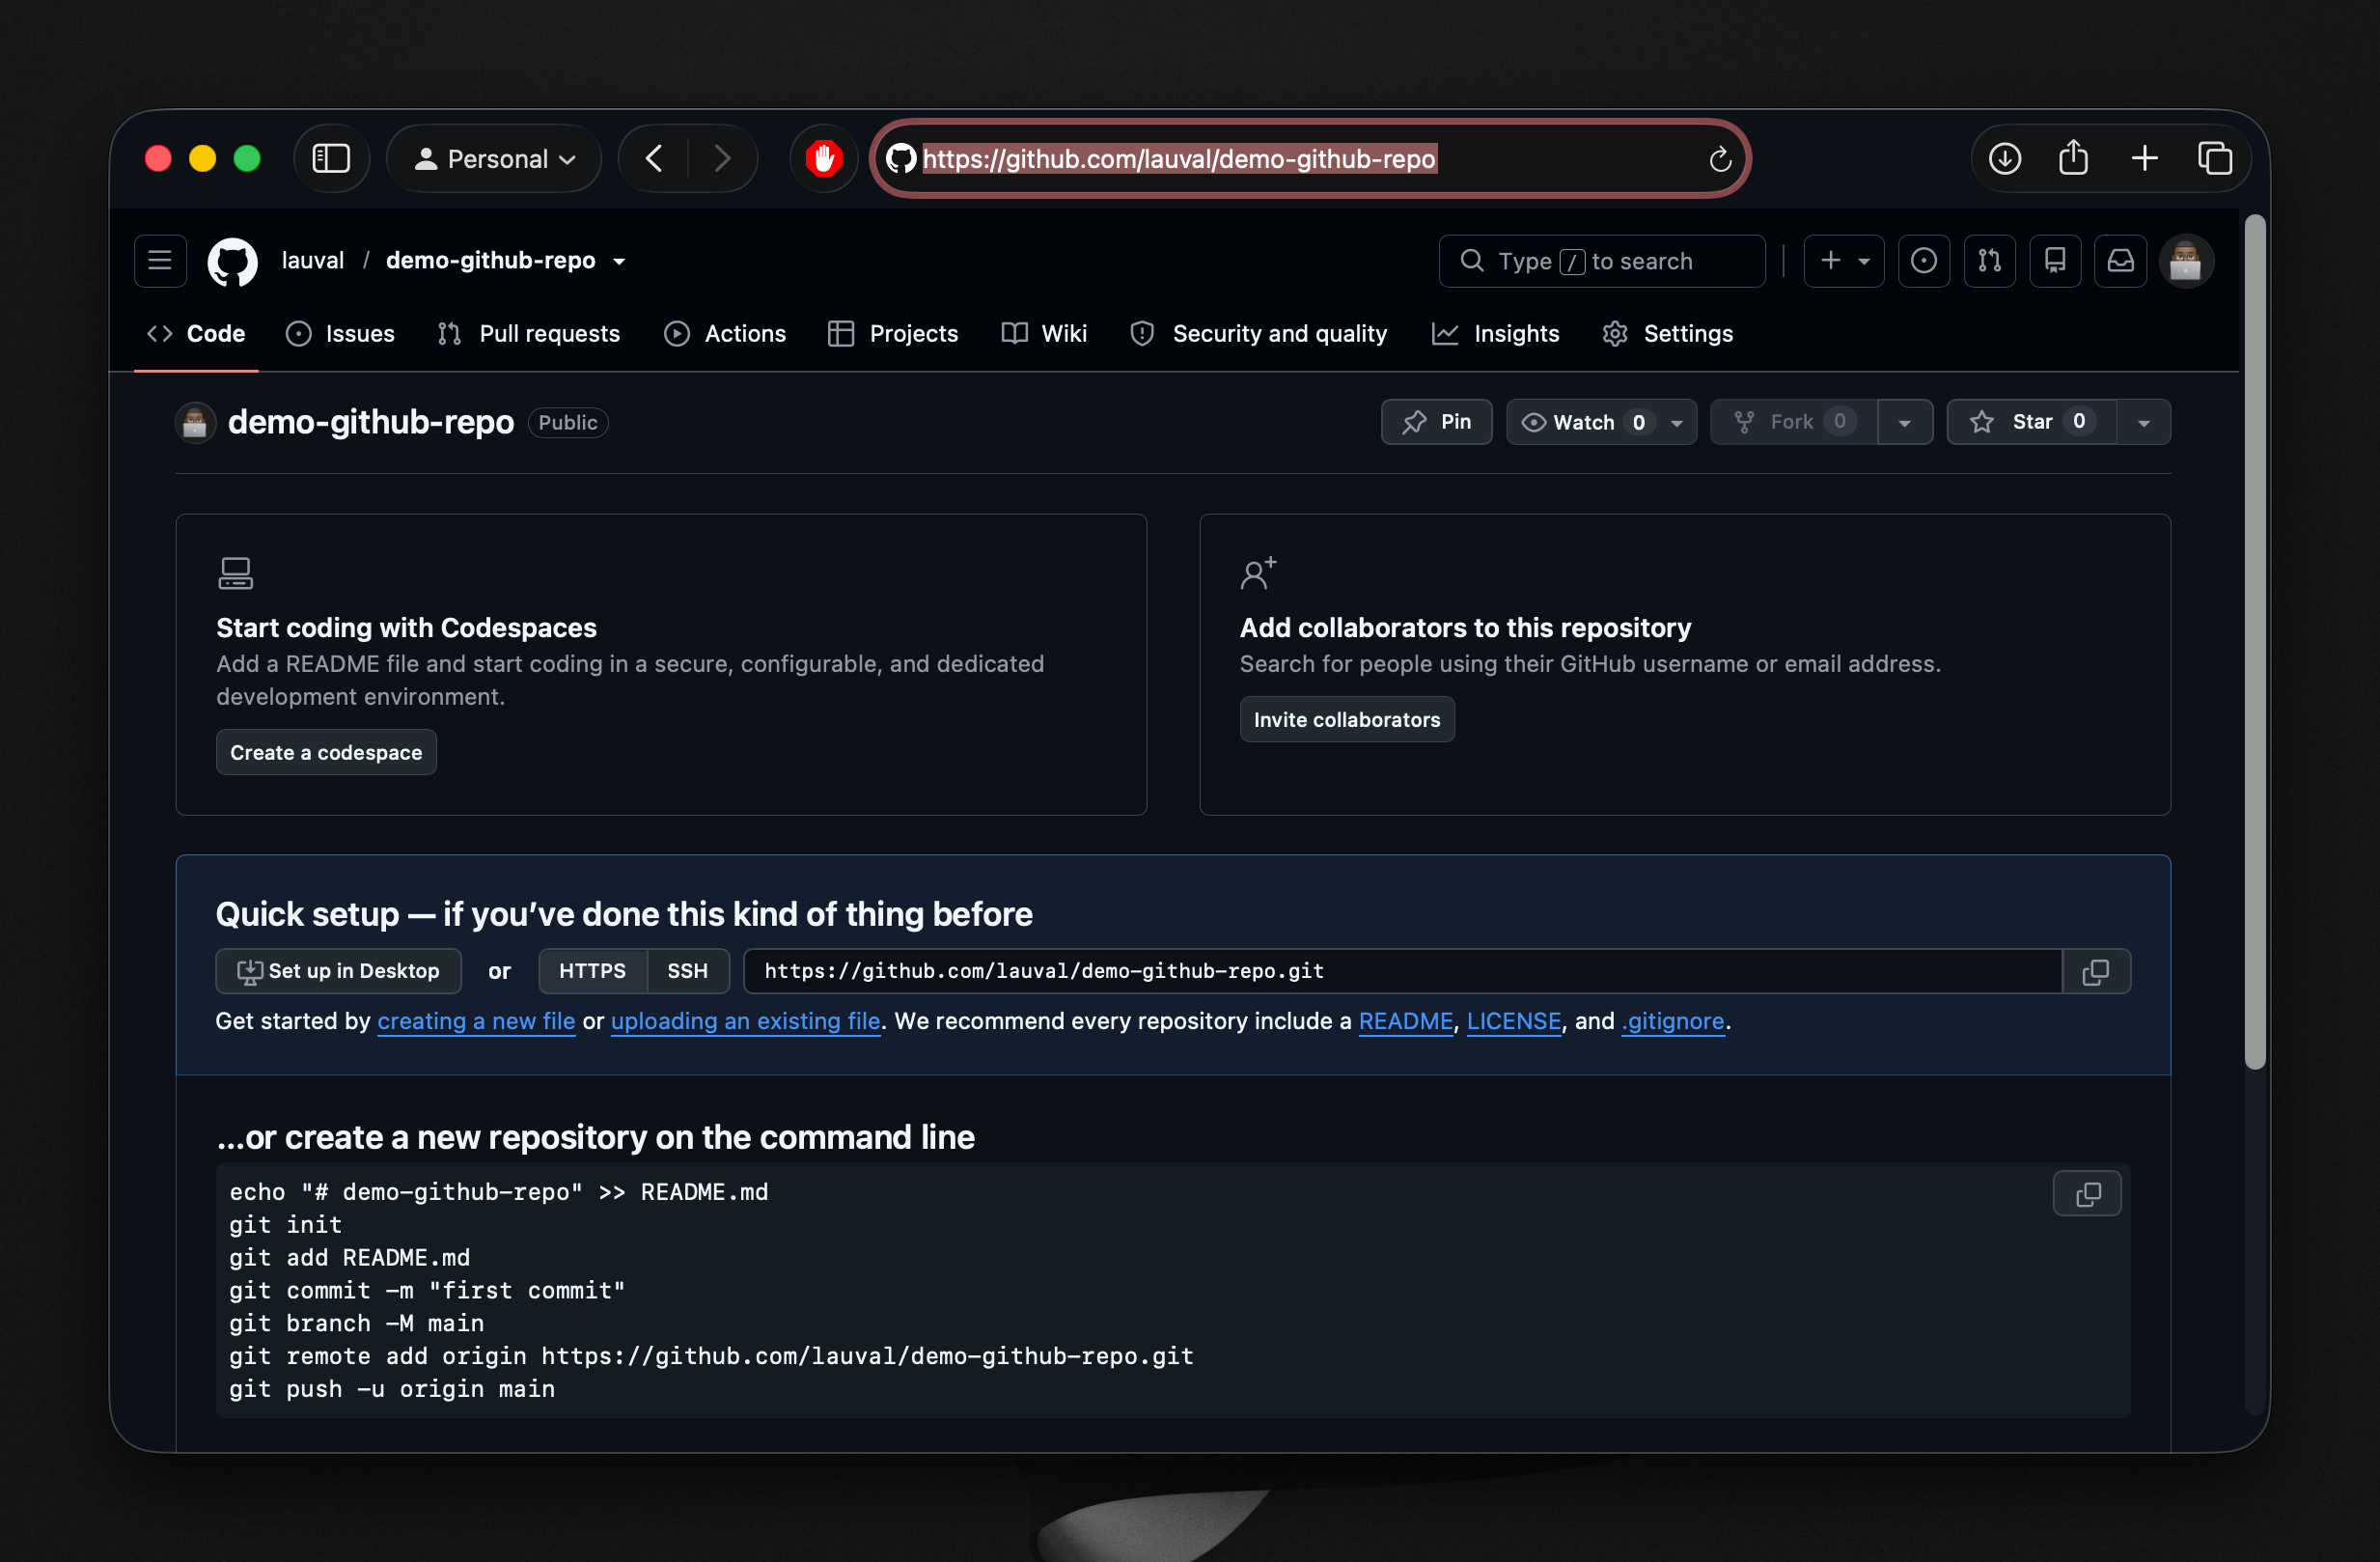
Then paste it back in the terminal, constructing the full command, and of course press Enter to run it. Don’t worry, it won’t give you any ouput, unlike checking the version of git or uv you’re running.
And that’s it. Your project is now connected to your GitHub repository.
9. SAVE YOUR WORK (COMMIT AND PUSH)
Once you’ve made some changes, like editing constants.py with your ship name, you can save them to GitHub with these three commands:
1
2
3
 git add .
git commit -m "session 1: personalised my ship"
git push
What do these commands do?
git addtells git which files you want to save. You can name the specific files but we usually use the fullstop to mean “add everything”.git commit -m "..."saves a snapshot of those files with a short message describing what you changed.git pushuploads that snapshot to your GitHub repository.
The first time you push, git may ask you to log in to GitHub. Follow the prompts. It will either open a browser window or ask for a username and token. You can just proceed without changing anything.
You may also be asked to set two values: your email and your name. There’s also a chance that these are set for you, automatically. Either way, it’s worth copying these commands and editing your name and email. It’s a good idea to use the same email as your Github account.
1
2
 git config --global user.name "Your Name"
git config --global user.email "your.email@example.com"
After editing they may look something like this (these are my credentials, use your own):
1
2
 git config --global user.name "Laurent"
git config --global user.email "laurent@ocean-ai-sey.com"
After setting those up, you can run the add, commit, and push commands. Don’t forget to include a message after git commit -m. See the screenshot below for my commit message. Try to make it descriptive so that you can easily see what changed from session to session.
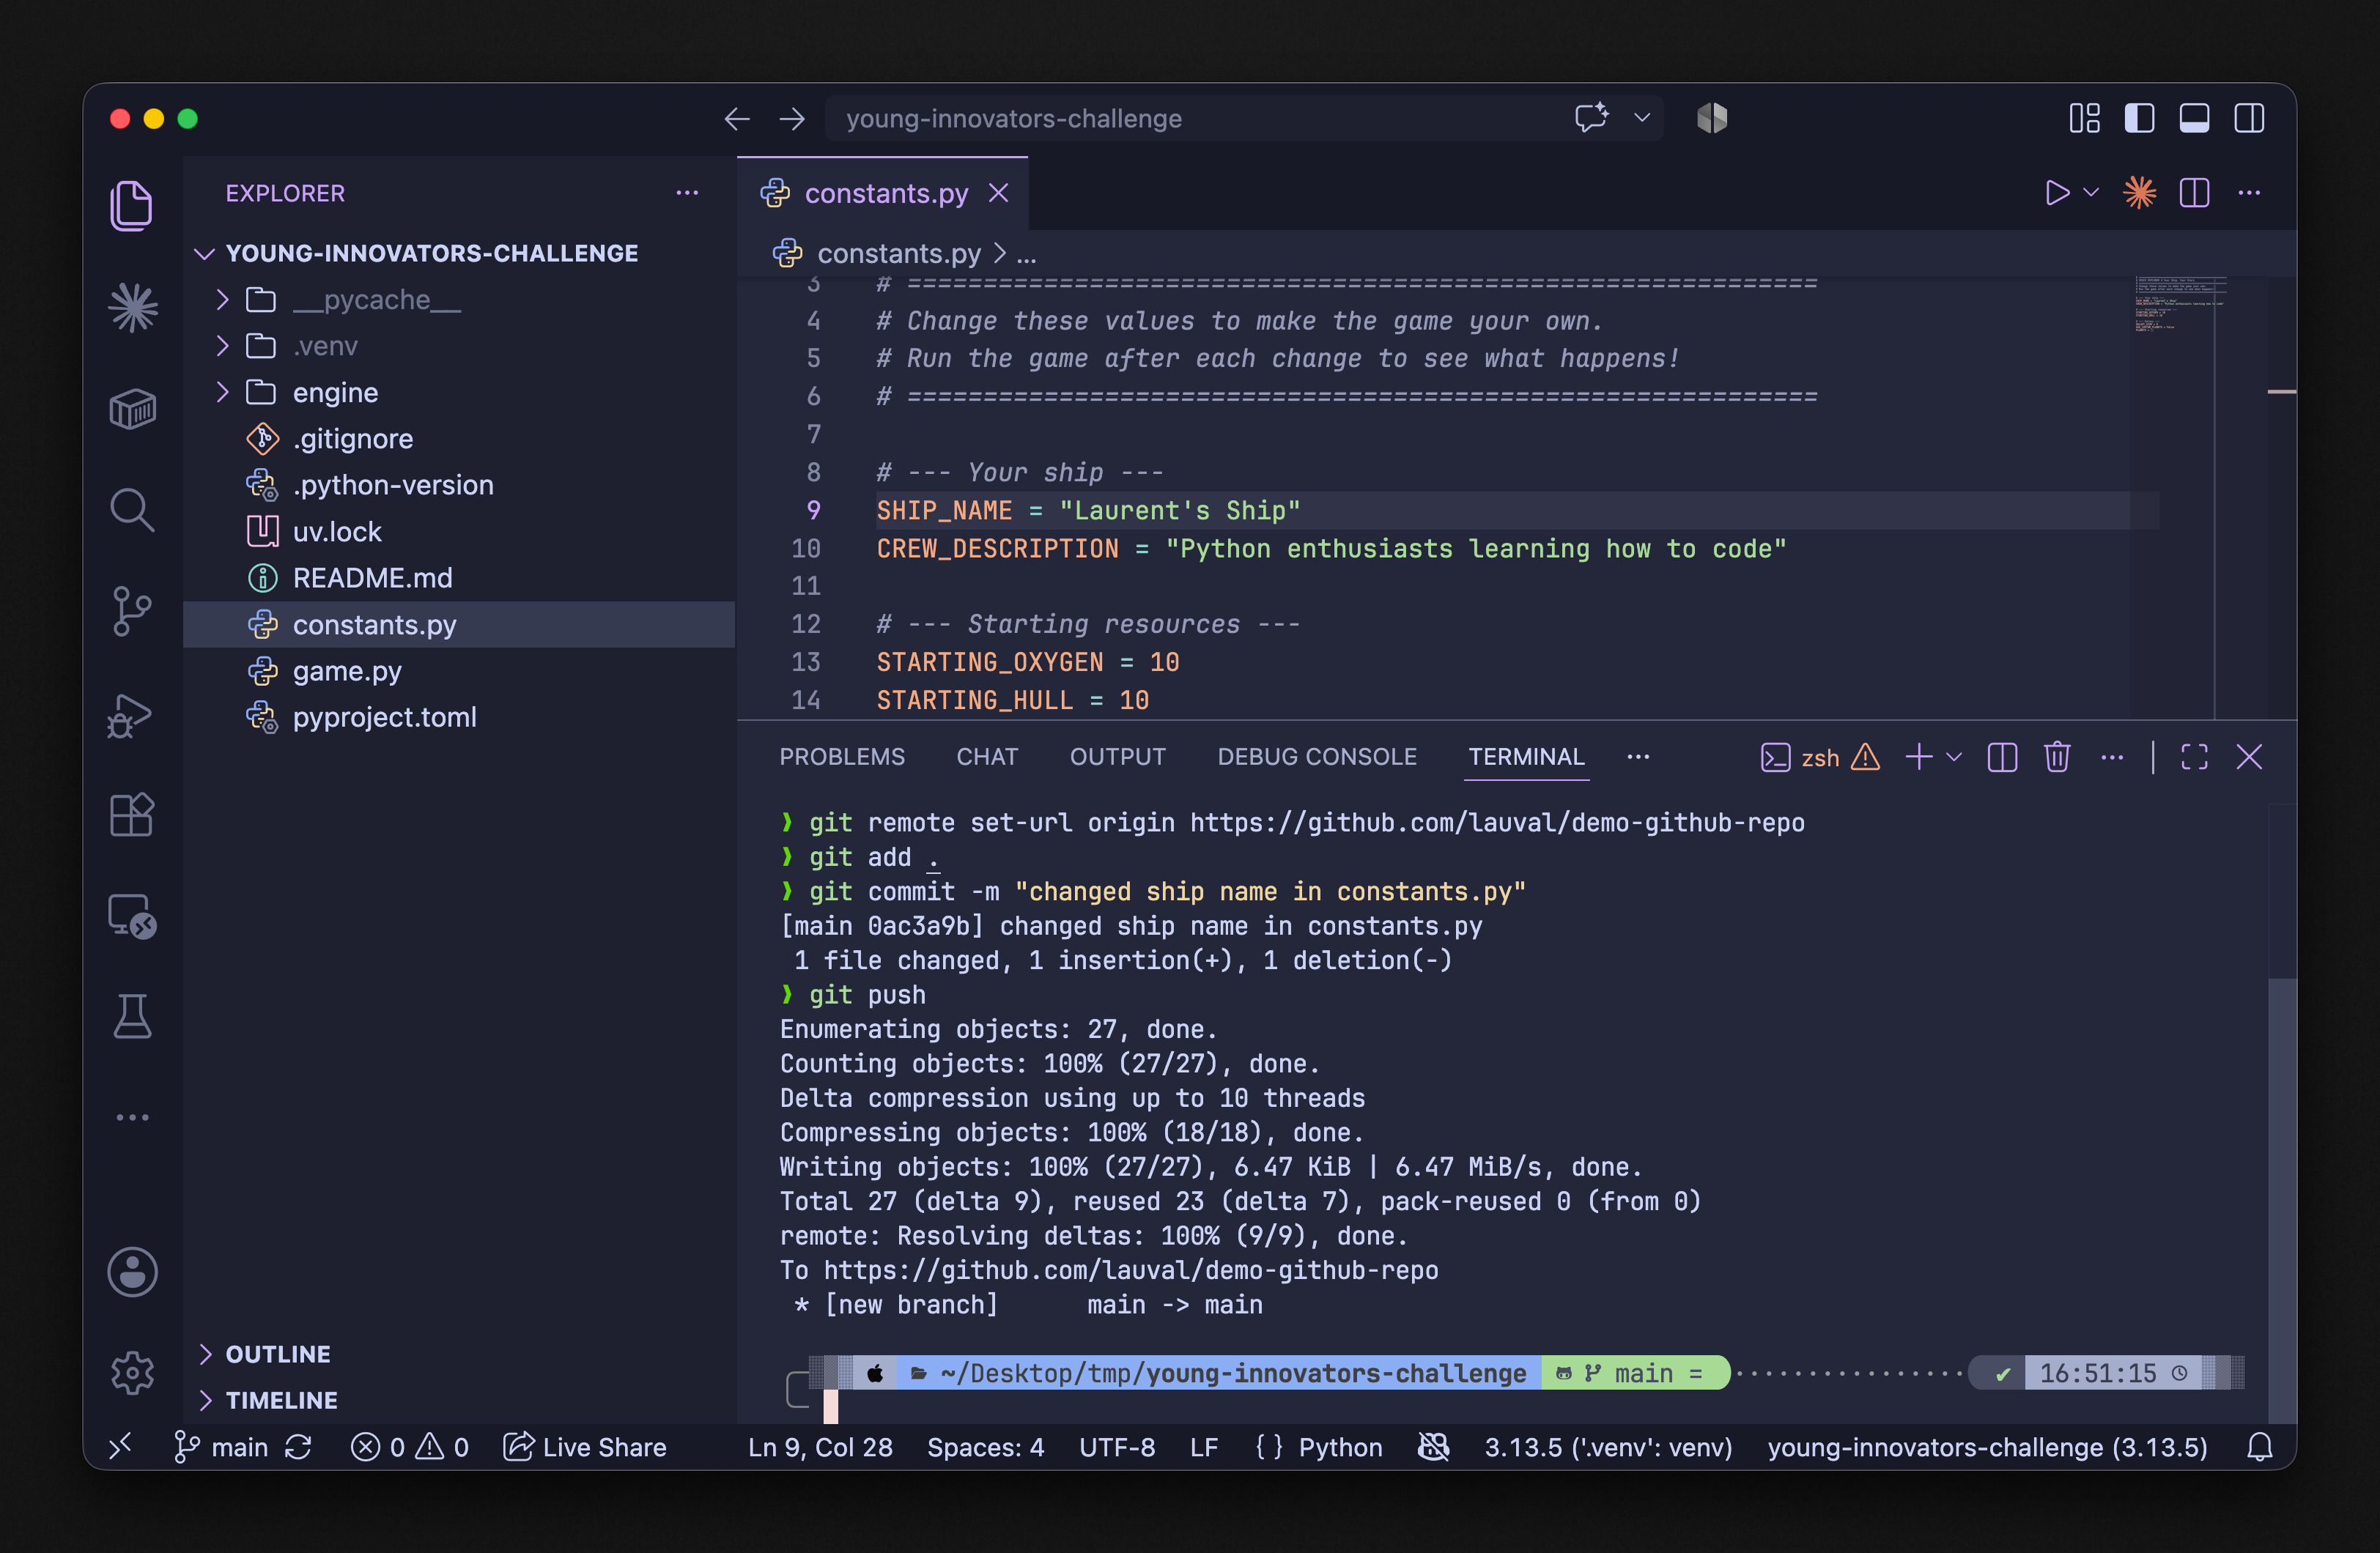
And there you have it.
VS Code, Python, git and GitHub are all set up, the game is running and you have your own copy of the project ready for the rest of the course.
TROUBLESHOOTING
-
“command not found” when running
uvorgitClose your terminal completely and open a new one. The install added the program to your PATH, but your current terminal doesn’t know about it yet. On Mac, you can also try runningsource ~/.zshrcorsource ~/.bashrc. -
uv run game.pysays “No such file or directory” You’re not in the right folder. In VS Code, go to File → Open Folder and select theyoung-innovators-challengefolder. Then open a new terminal. -
git push asks for a password and rejects it GitHub no longer accepts plain passwords. You’ll need to use a personal access token instead. Go to GitHub → Settings → Developer settings → Personal access tokens → Tokens (classic) and generate one. Use that token as your password when git asks.
-
VS Code feels cramped Close the Agents tab if it’s open (the icon on the left sidebar that looks like a sparkle or wand). You can also toggle the Explorer panel with
Ctrl + B(Windows) orCmd + B(Mac) when you need more room for code.
Enjoy Reading This Article?
Here are some more articles you might like to read next: