THE 100% FREE EMAIL SETUP THAT WE USE AT OCEAN AI
I recently set up our email stack and I thought I’d share the experience so that other NGOs or students or whoever could set up their own email routing infrastructure for free.
The only caveat to all of this is that it isn’t, technically speaking, 100% free. We (OCEAN AI) are early-career professionals so we’re not exactly swimming in cash, but we can afford to buy a domain (in our case @ocean-ai-sey.com).
That means that the only pre-requisite, if you’re trying to follow along, is ownership of a domain. I’ve always used Cloudflare registrar to purchase mine just because they’re a reputable company and there are security benefits you get on the free plan. There have been no issues, to date, but I’m also not outwardly endorsing Cloudflare. So not only would I recommend buying your own domain but I’d also recommend doing your research and weighing your options. There are loads of other providers to choose from, each with their own perks and pros and cons.
So without further ado, let’s dive right in.
THE PROBLEM STATEMENT
The long story short is that a conversation with a friend inspired me to reach out to embassies to enquire about funding opportunities in STEM and AI (since that’s what we’re all about at OCEAN AI).
But then I thought it would look so much more professional if we were sending emails from a custom domain (@ocean-ai.com would have been ideal but someone else already owns it). My reasoning was that an org looking to disburse funds would feel more at ease entrusting us with their money if we’d at least gone through the effort of presenting ourselves professionally.
The only problem is that we didn’t have a domain at the time and I didn’t want to ask members to pay even $7 out of pocket for Google Workspace, which would have easily covered several needs at once, including cloud storage, higher limits on the Gemini app, custom email addresses, etc.
The biggest constraint here is money. We had to do it for free.
Luckily, that’s entirely possible thanks to Resend and Cloudflare.
THE SOLUTION
It works like this:
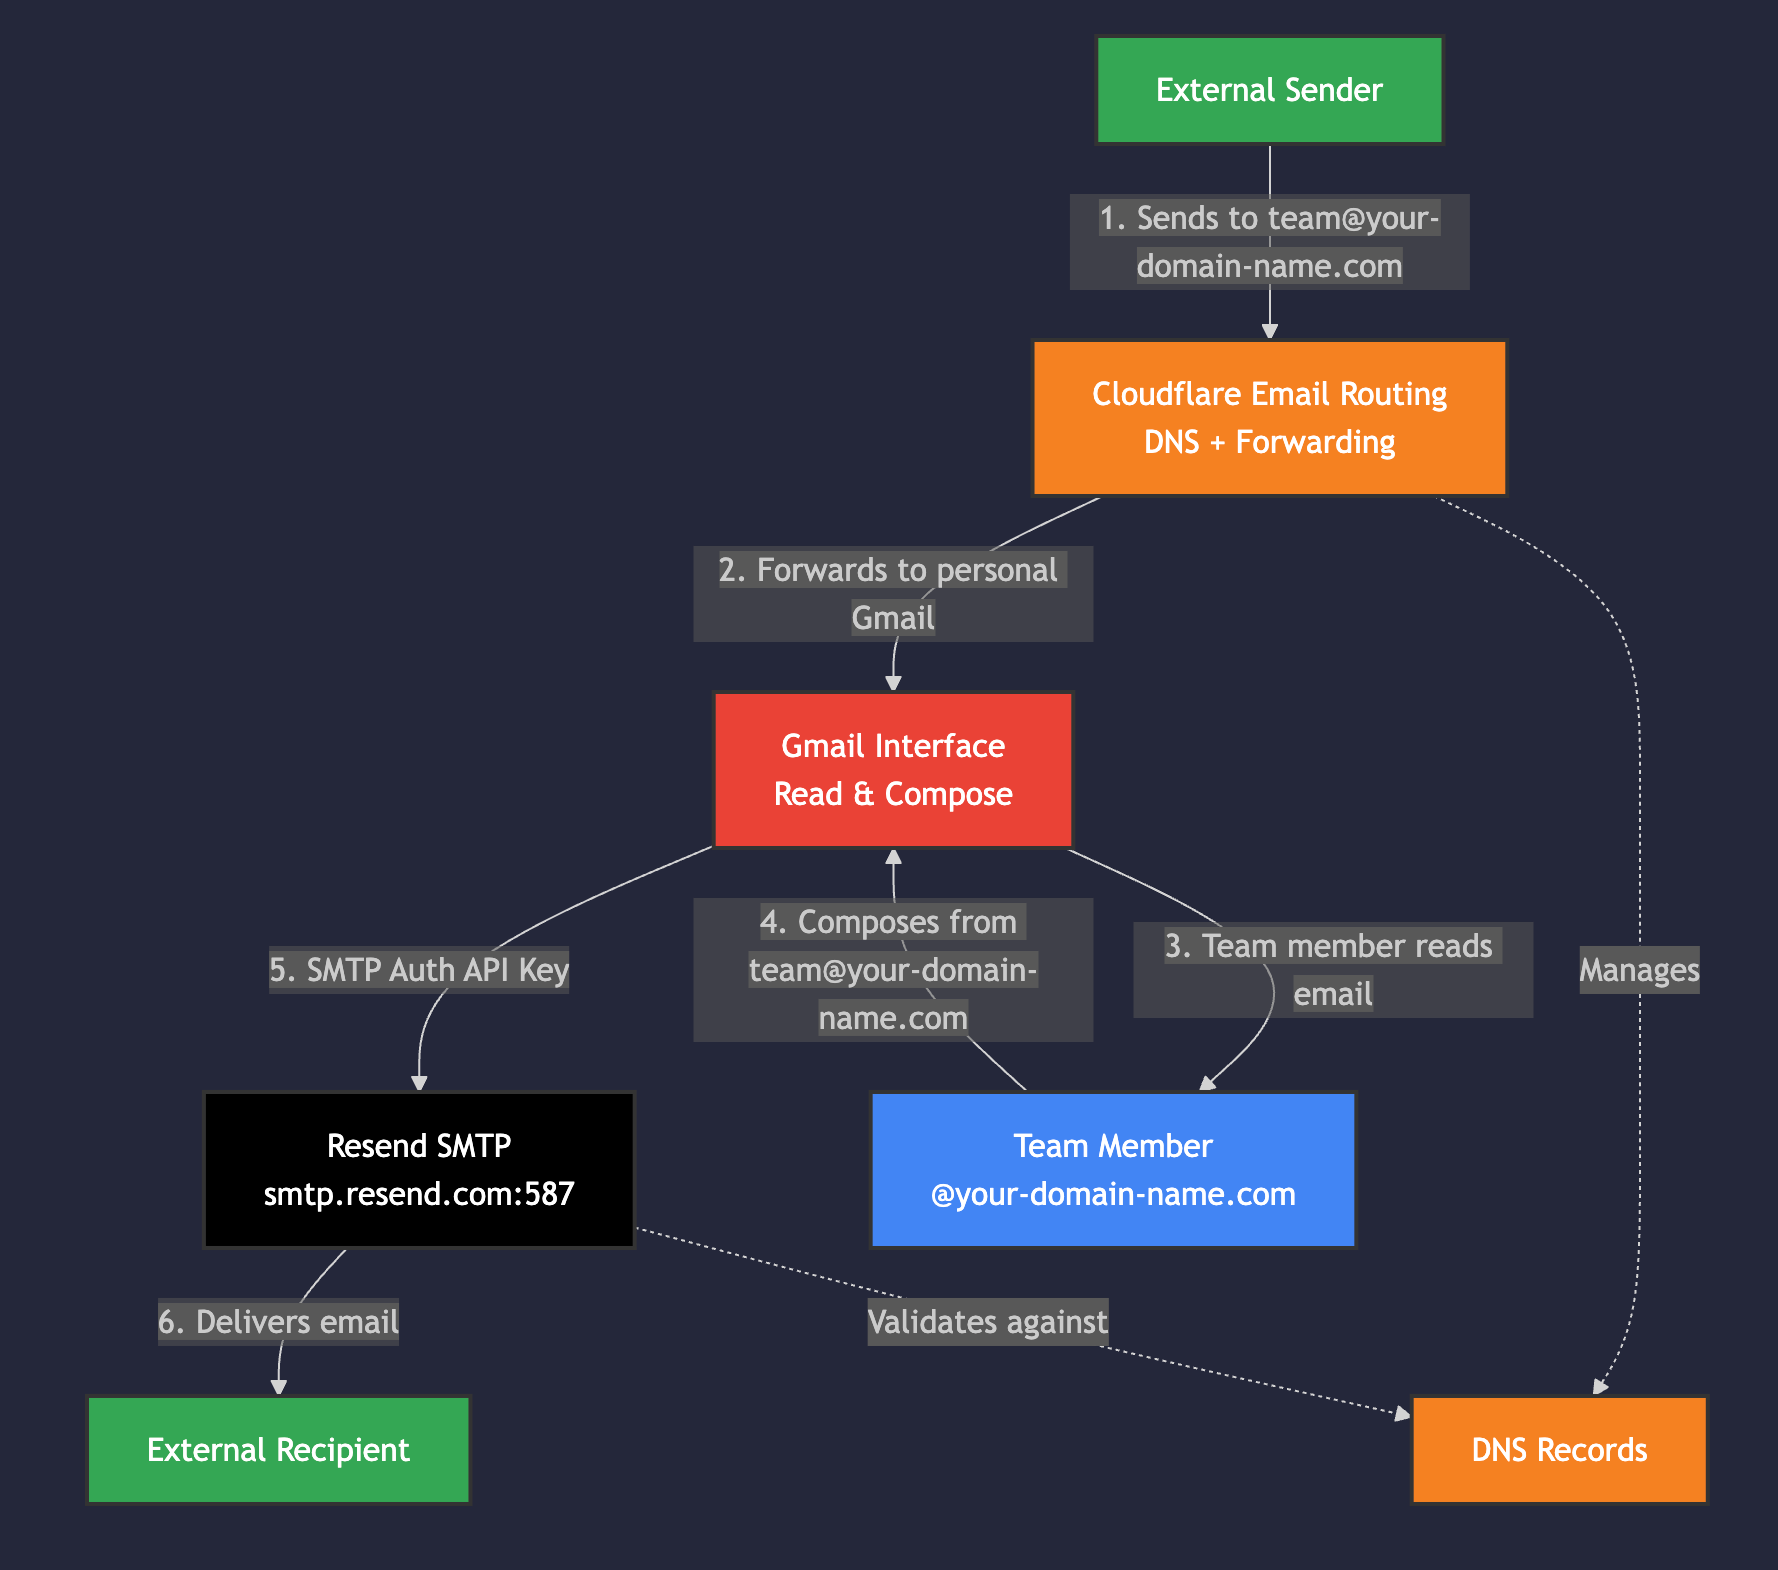
When an email sent to your custom email address e.g. “enquiries@ocean-ai-sey.com” it gets routed (forwarded) by Cloudflare to your personal email address.
You might then type a response through your normal email client (by client I’m referring to the app - the software you use to write and send your email e.g. gmail, outlook, etc.) Once you hit send, Resend handles the delivery of your email FROM your custom address.
So then you reply from enquiries@ocean-ai-sey.com rather than islander123@gmail.com.
Et voilà! Free email routing to and from your personal email address, through Cloudflare (incoming) and Resend (outgoing) that makes you look like an absolute pro.
The image below is called a mermaid diagram and it illustrates the process as described above.
THE METHOD
This is a no-code solution. It’s all clicks and tweaking settings. But we’ll be skipping some of the mundane setup instructions such as how to sign up to Cloudflare, how to buy a domain from their registrar service, how to sign up to Resend and how to set up gmail to send from your custom domain. Everything else is covered below.
STEP 1: CLOUDFLARE
-
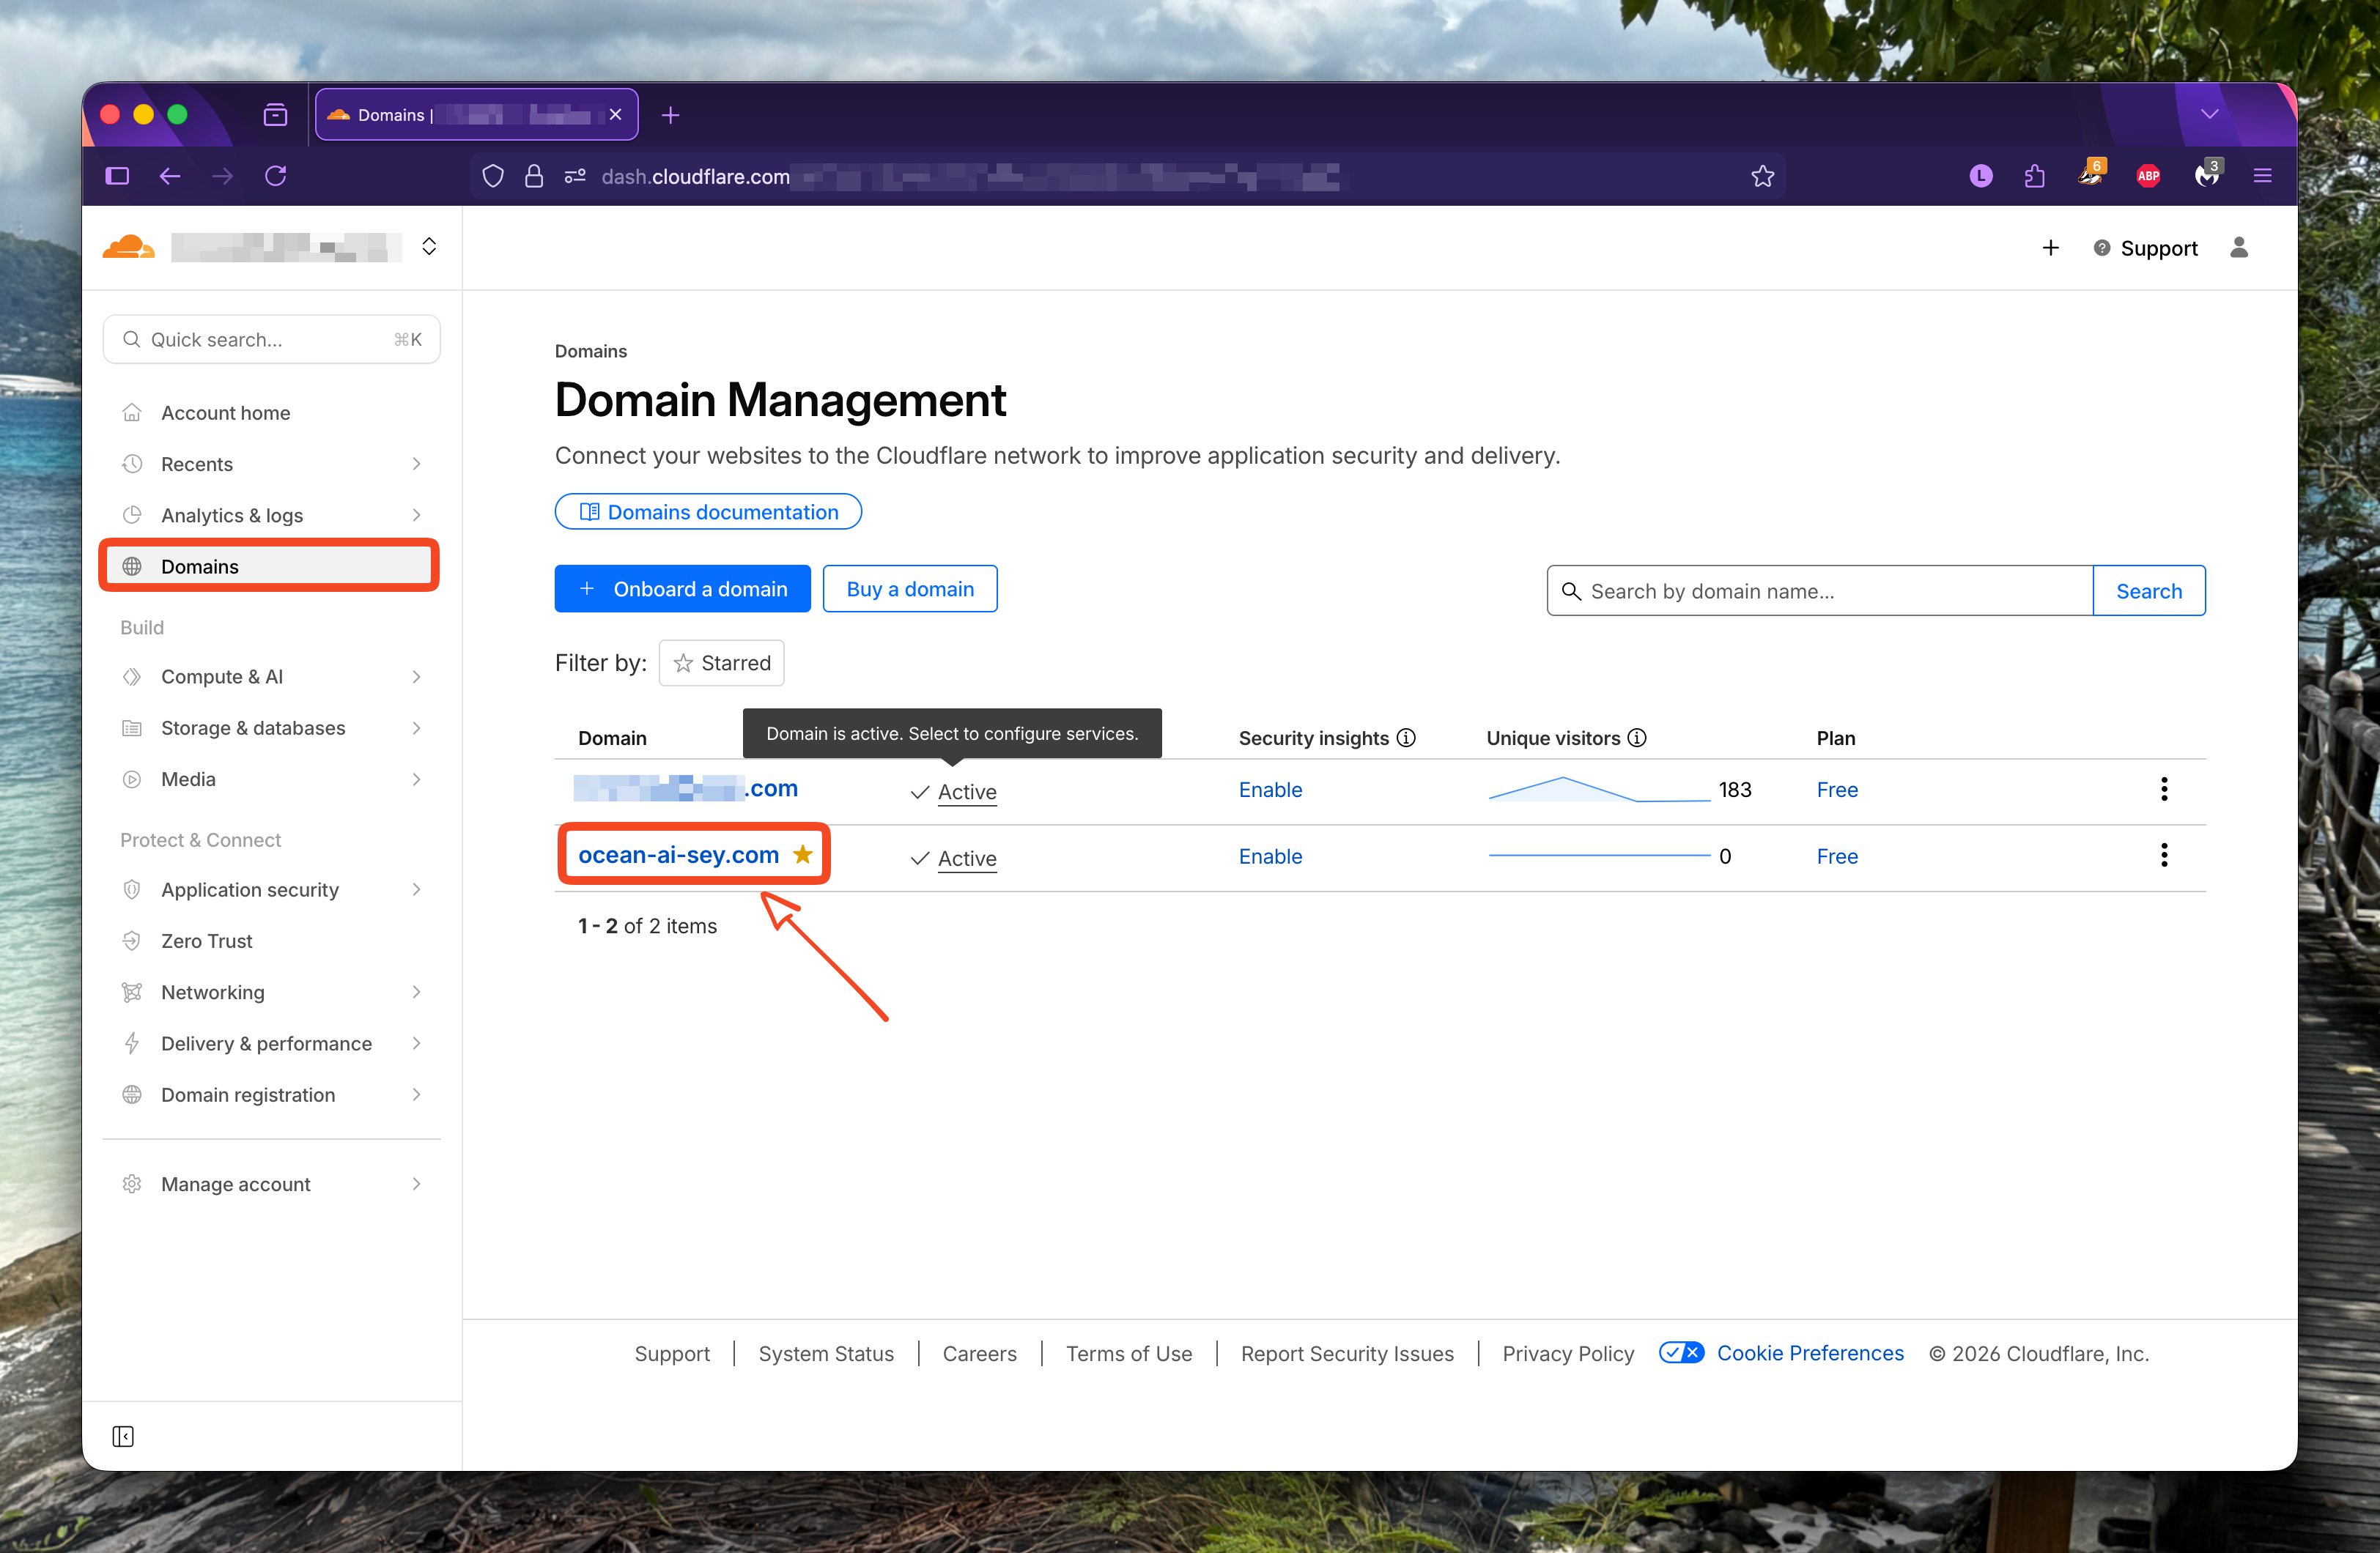
Once you’re logged in, and have the domain purchased or onboarded, you should see something like the image below. The first thing you’re going to do is click on the domain name to go to the domain-specific landing page.
-
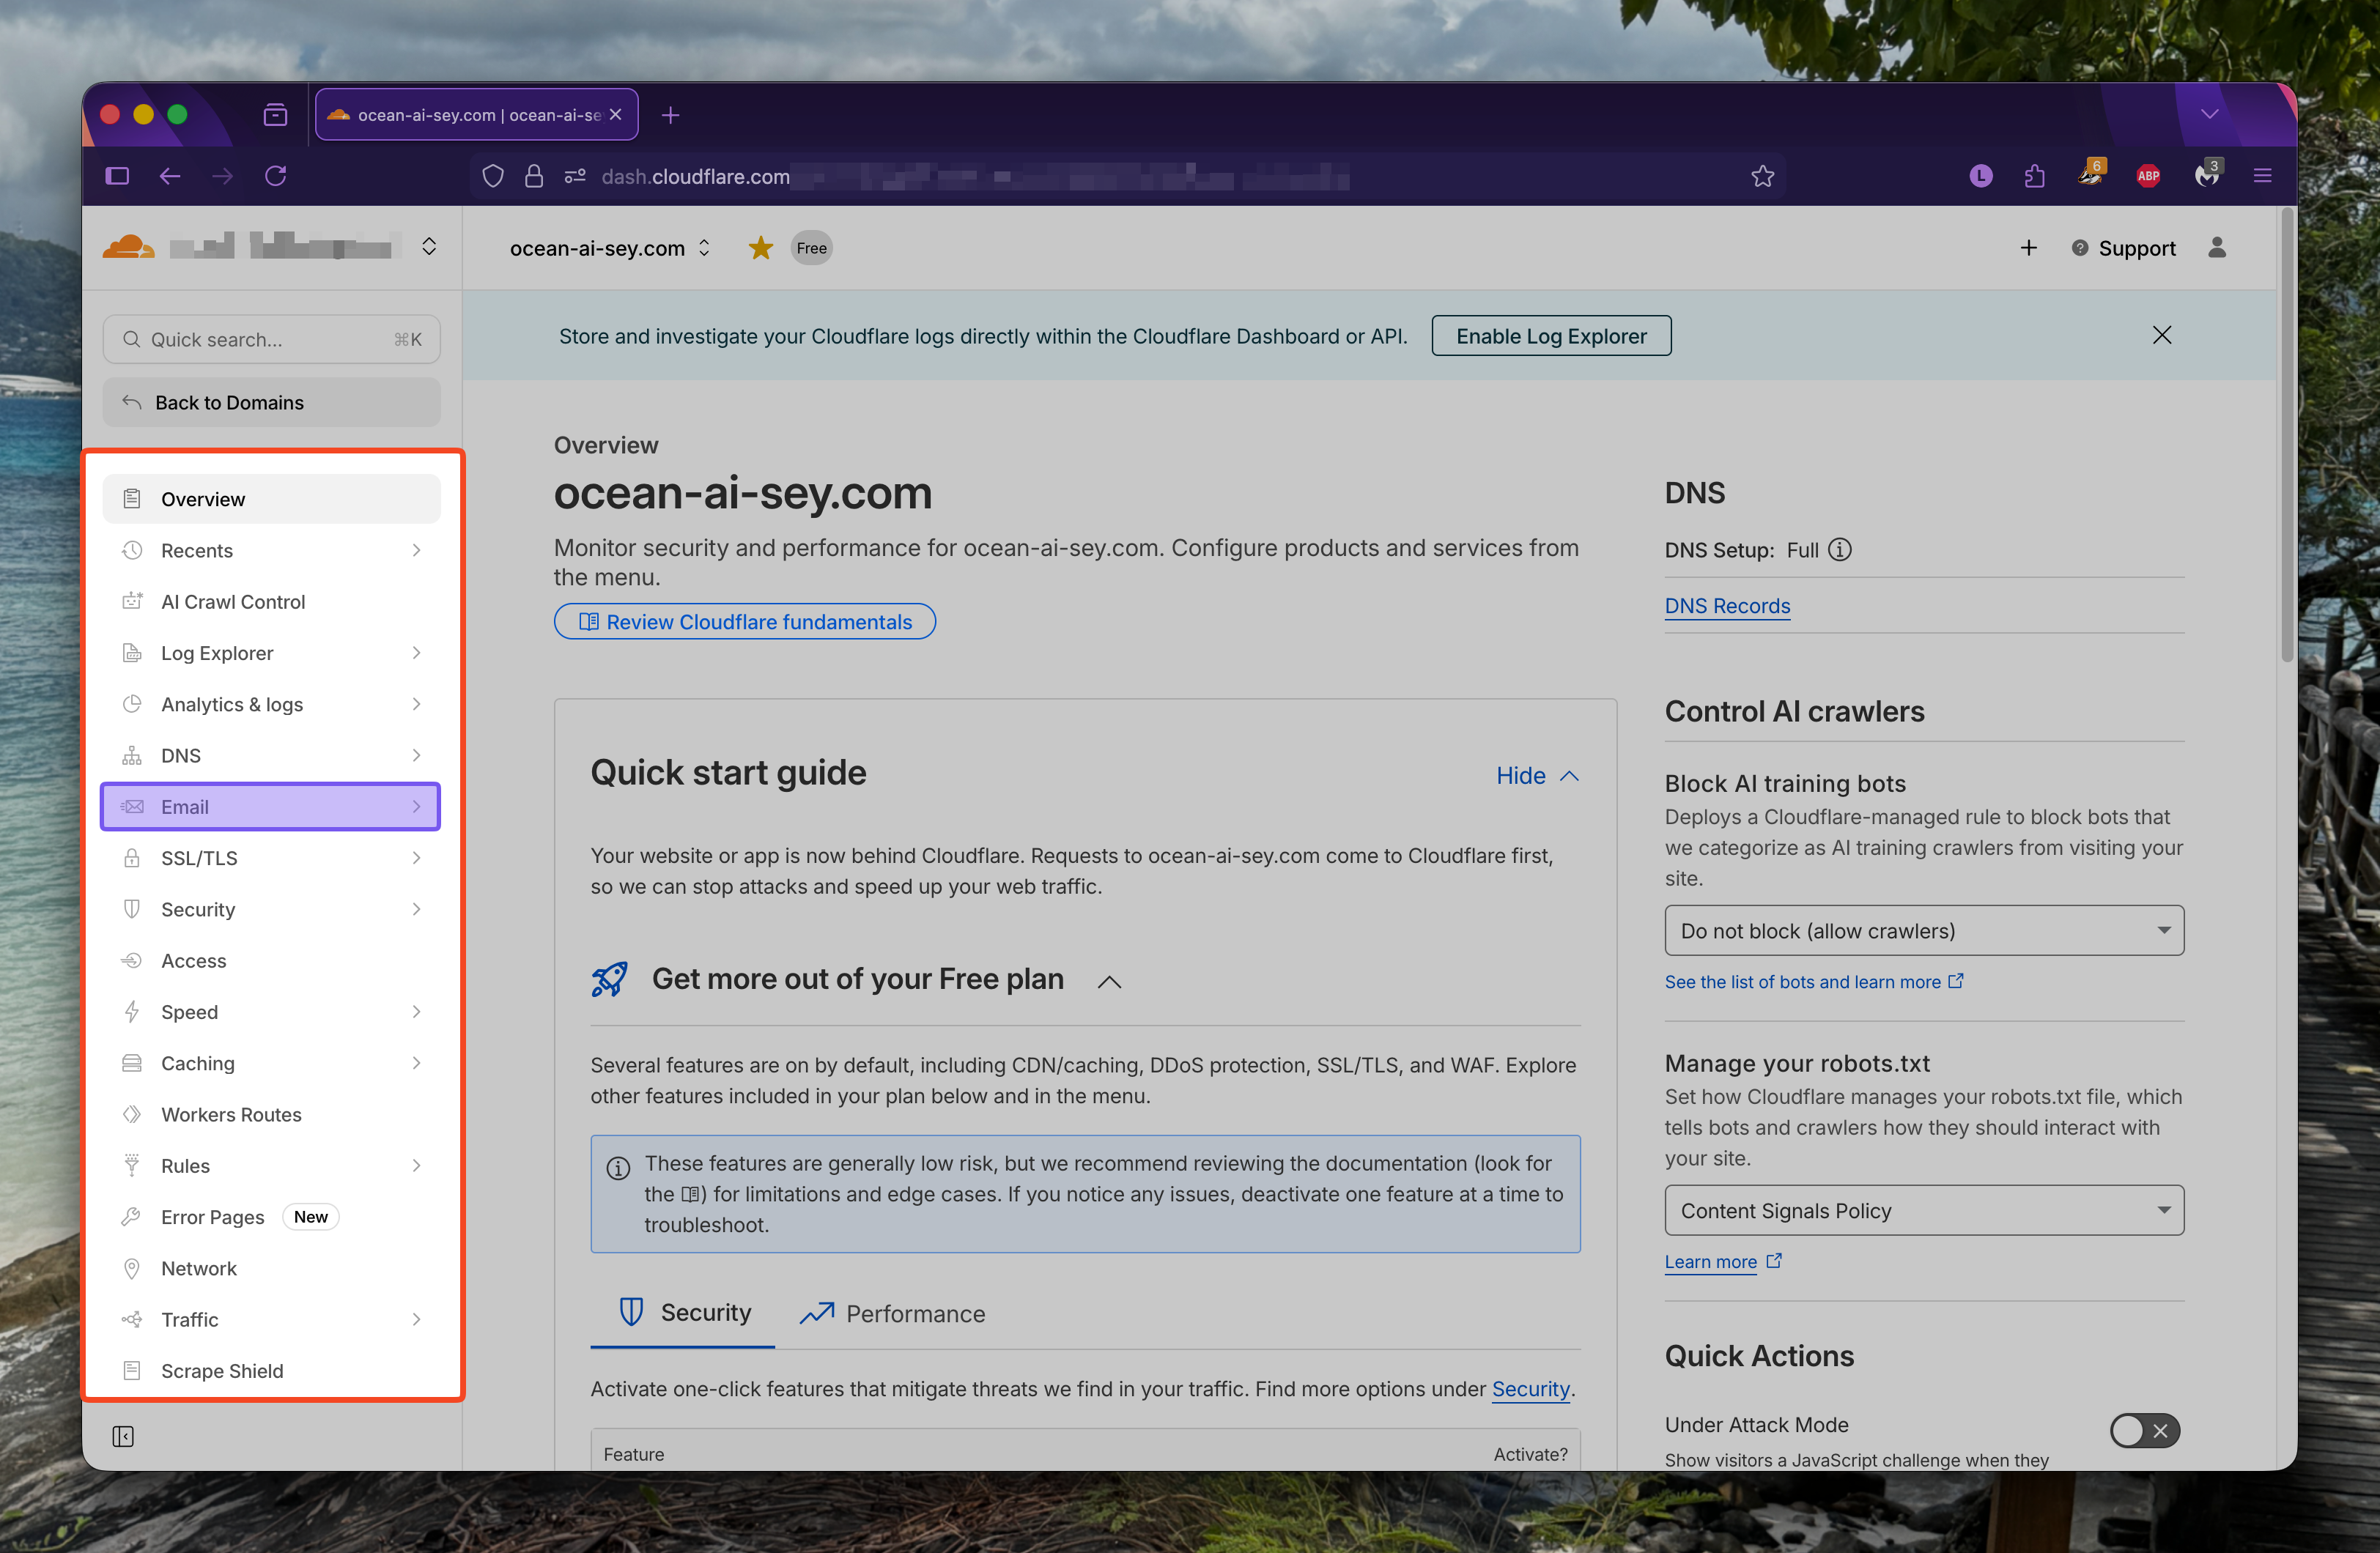
Then you’ll click on “Email” in the highlighted panel on the left. That will then drop down to a list of 3 options. You’re looking for “Email Routing”.
-
At that point it’s just about navigating to “Routing Rules” (red box) and then clicking on “Create Address”. Note that the destination address is the custom/professional email address you want to use. It should end with your domain e.g. enquiries@ocean-ai-sey.com.
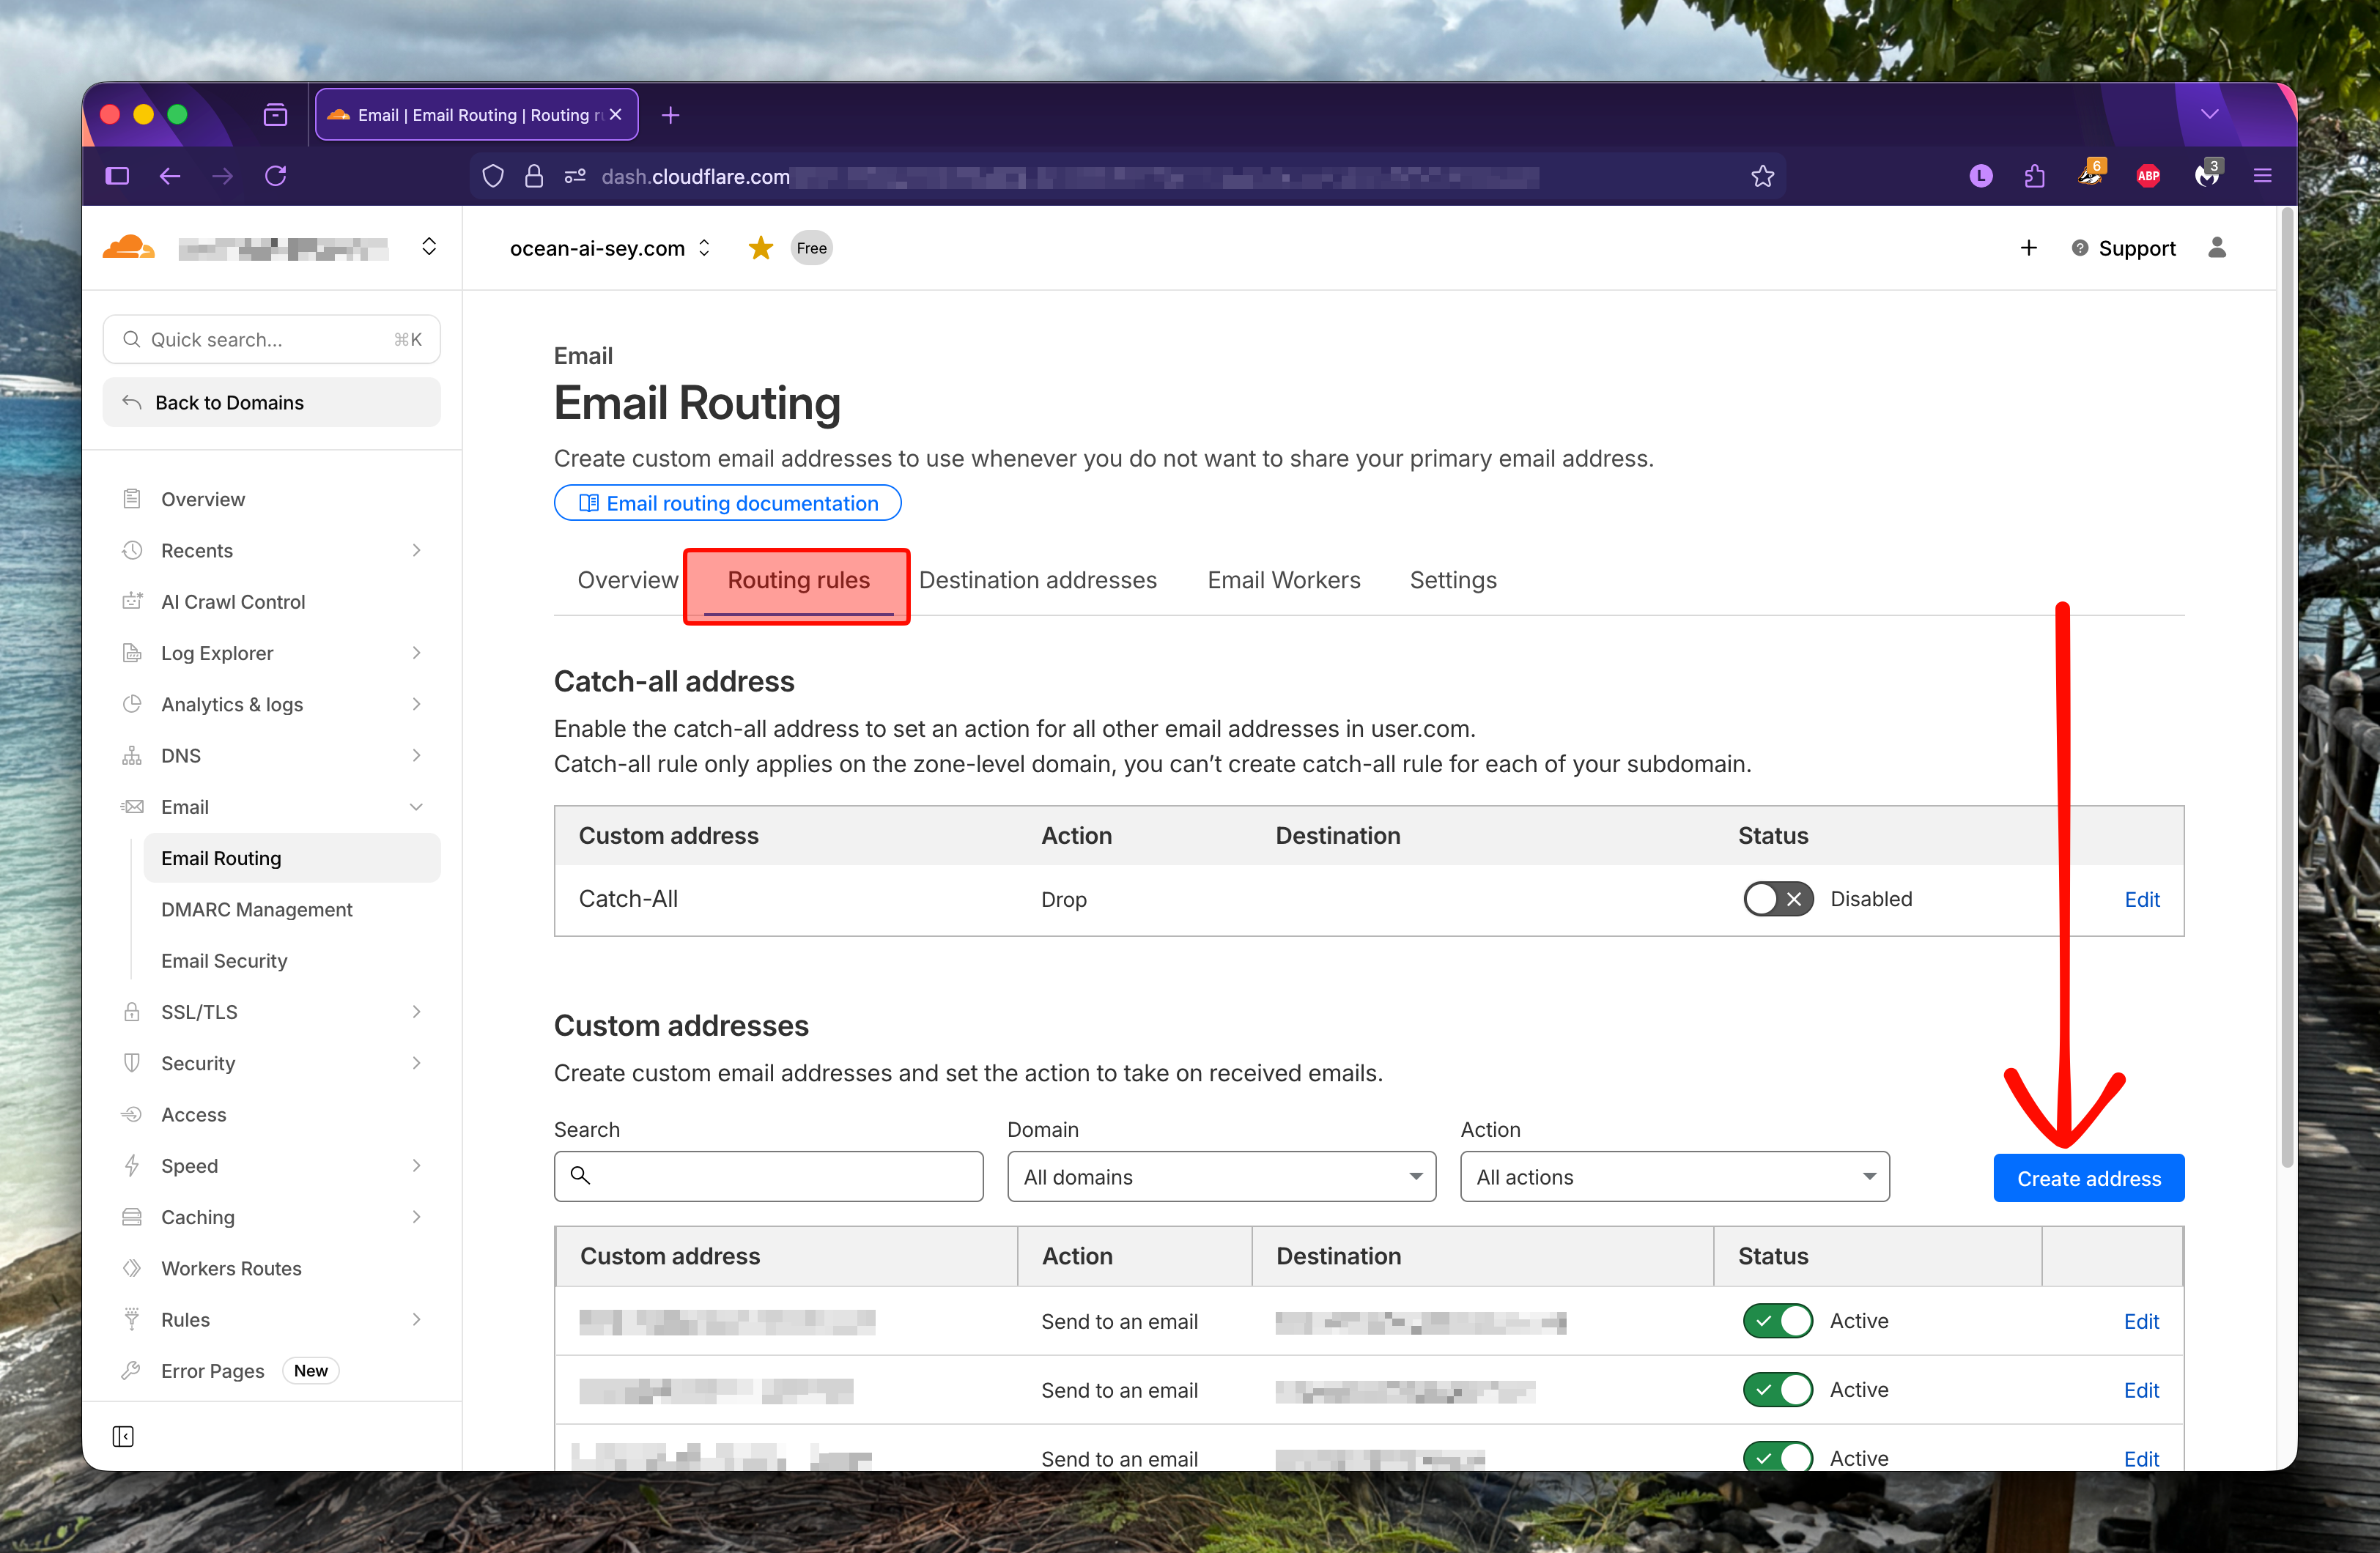
And that’s it, that’s your receiver address set up.
Now we tackle the sender address.
STEP 2: RESEND
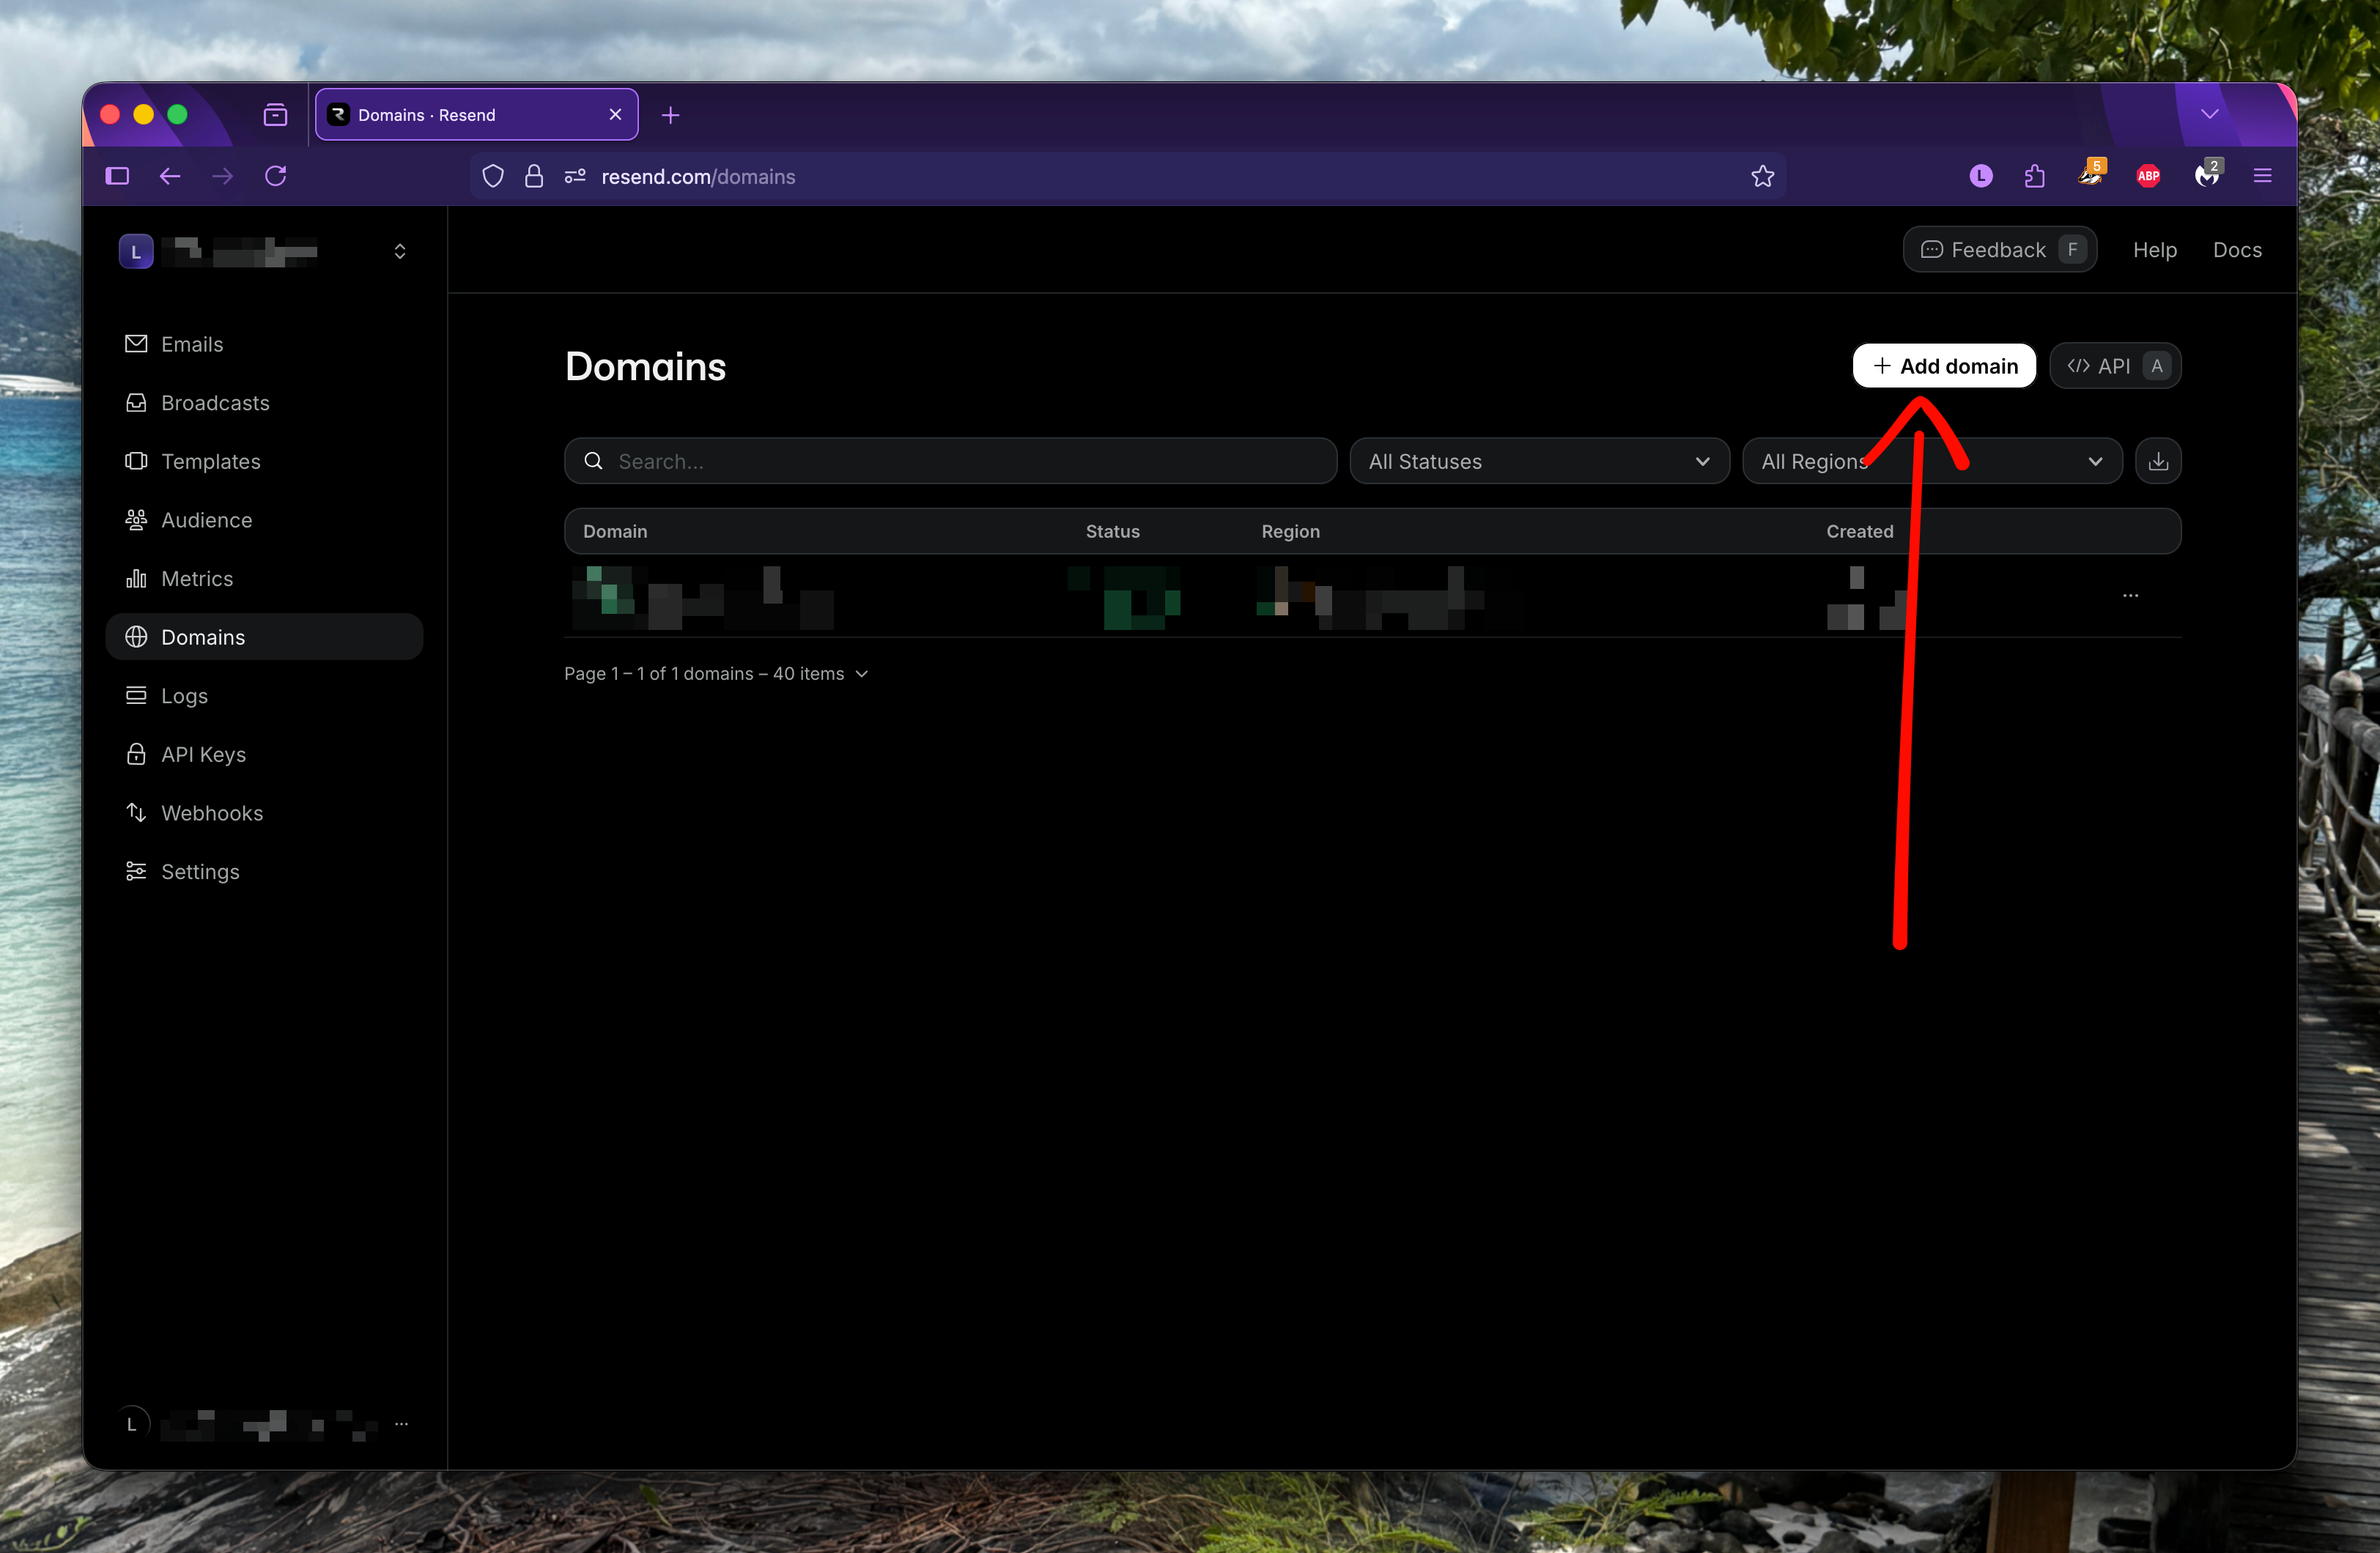
-
Add your domain to Resend. This was super easy for me since they had an option to connect to popular providers like Cloudflare. So all I had to do was follow the login steps for Cloudflare and click next a few times and that was it. It took a few minutes (5, maybe?) to verify the domain and add the necessary records.
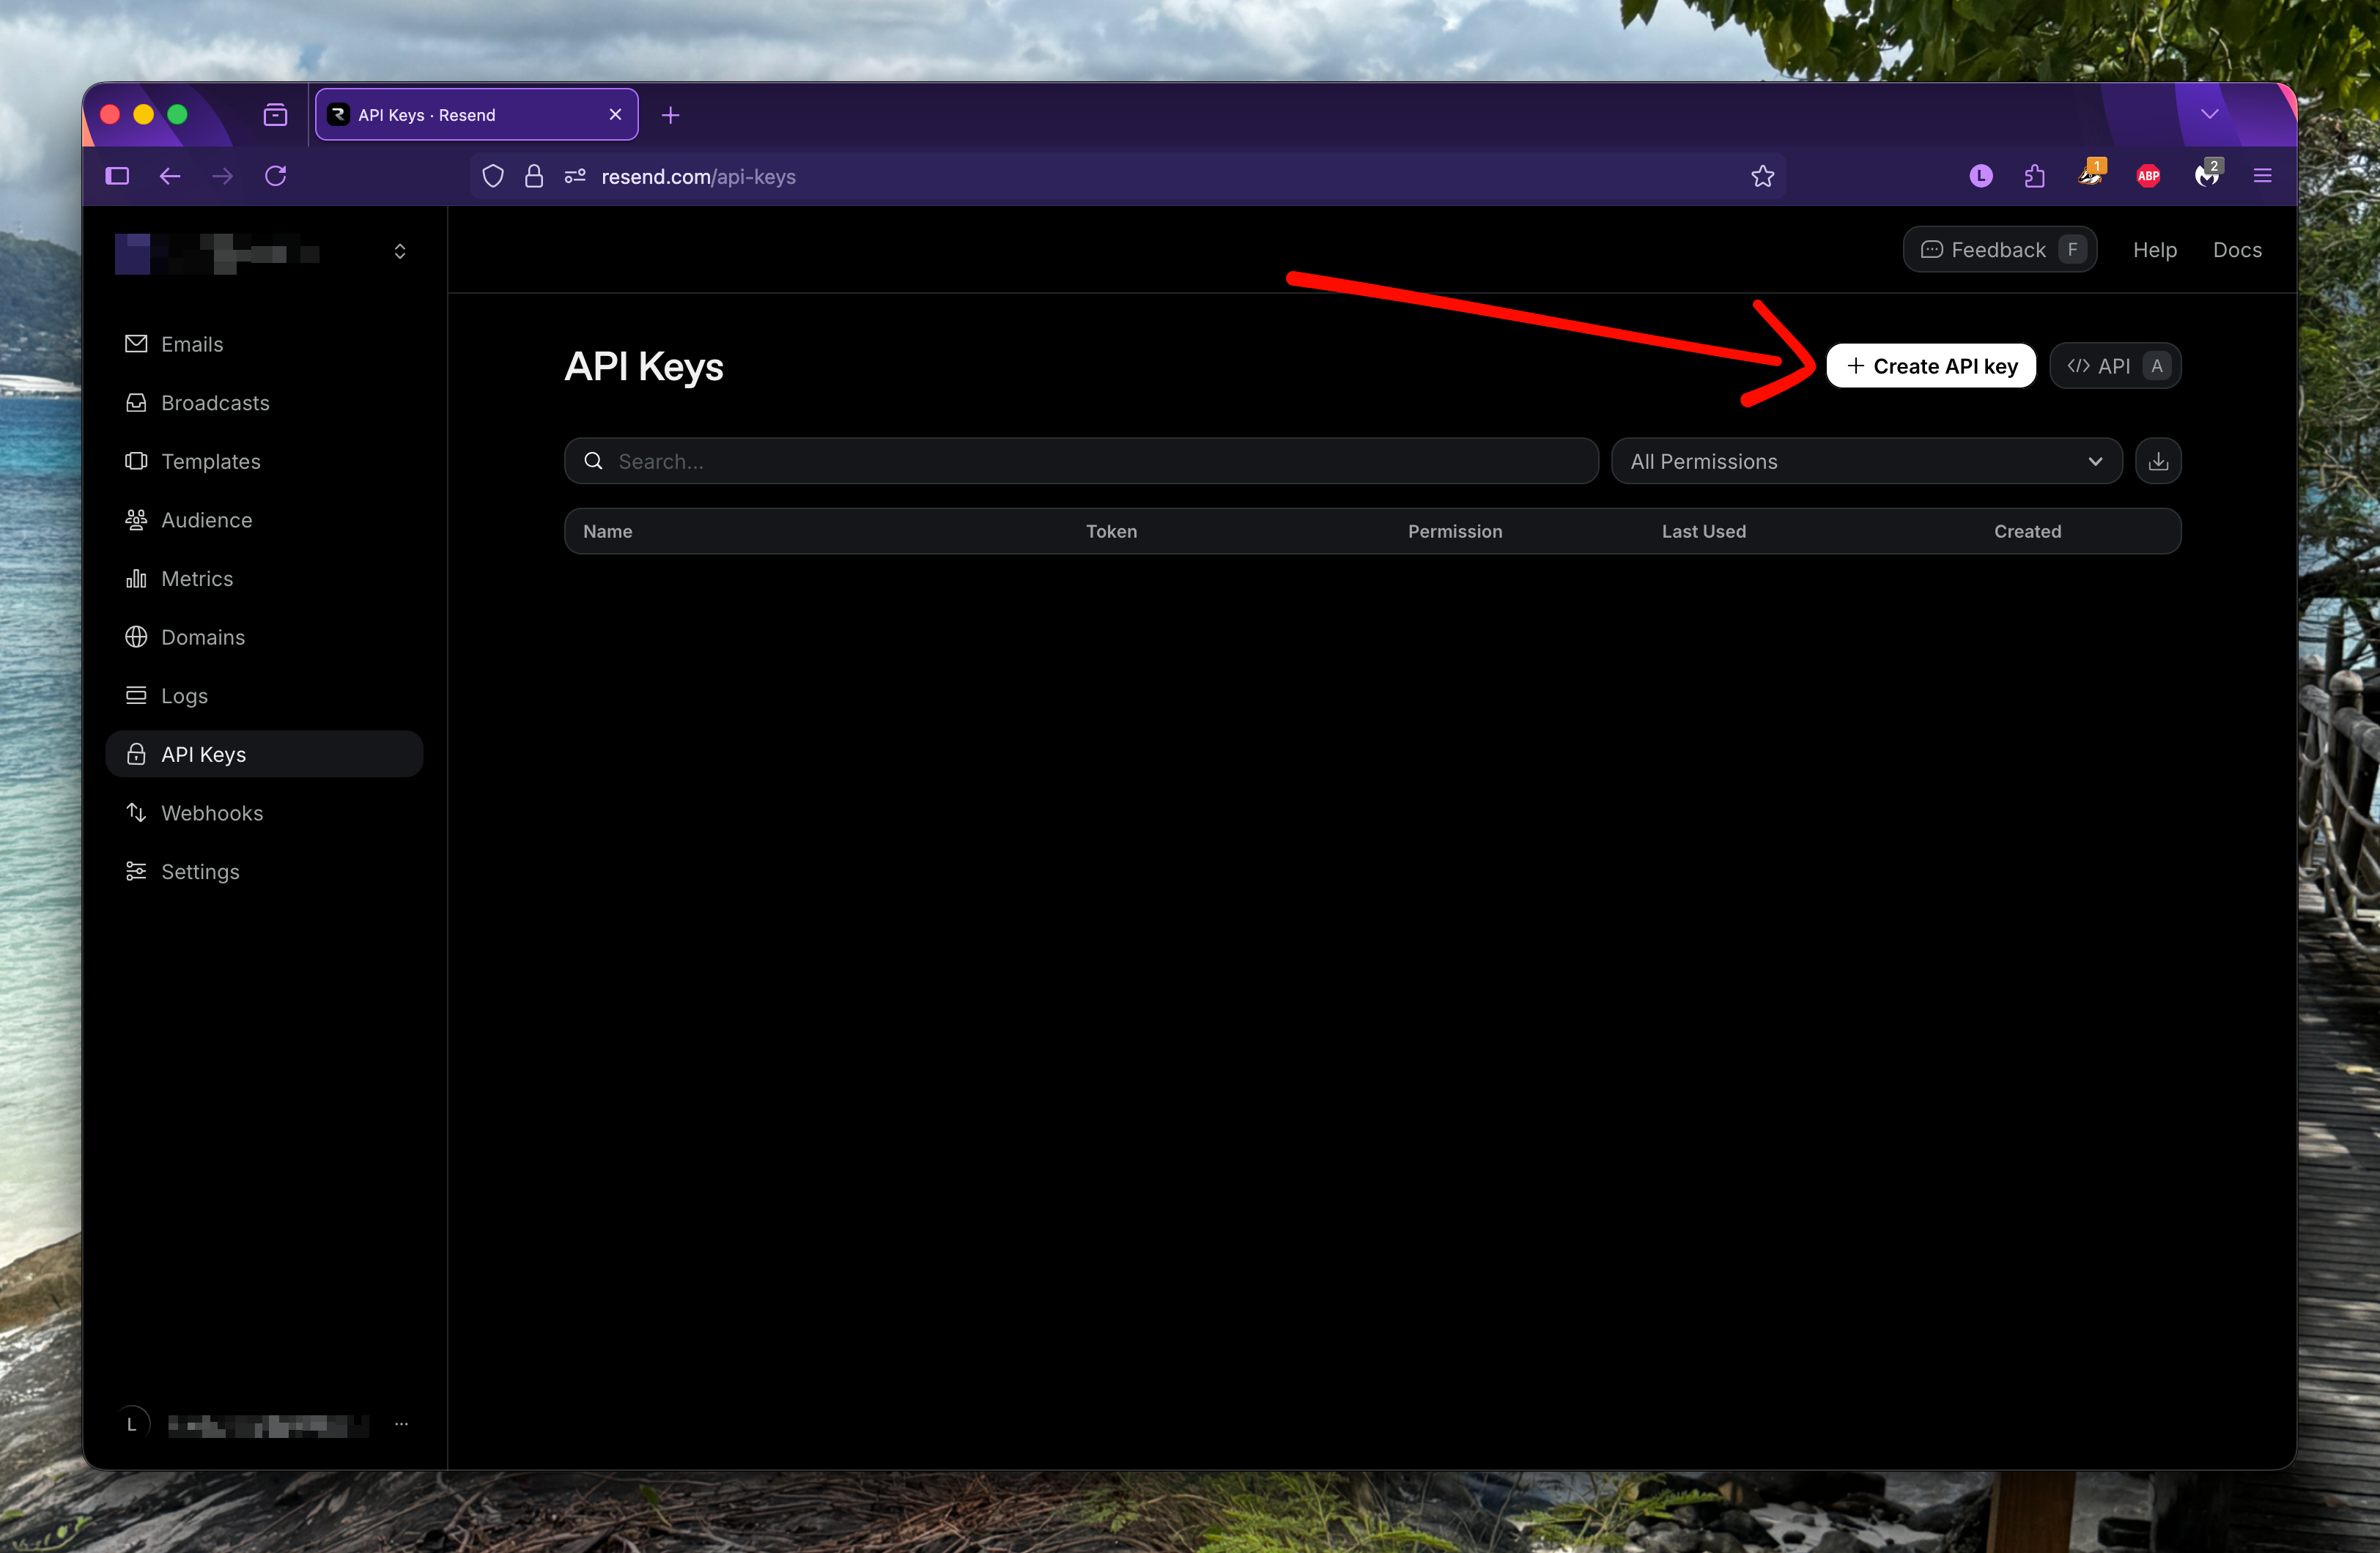
-
Create an API Key. Select “Sending Access” under Permissions. Then select your newly added domain (once it’s fully authenticated). And that’s it! You’ll get an API key that you’ll need to save somehow. I recommend using a password manager for this (I use Bitwarden). It’s NOT safe to store this in your notes app or in a random text file on your computer. API keys are like passwords so be careful to treat them as such.
-
The last step on Resend’s side is to navigate to settings and keeping the SMTP settings handy - you’ll need them for the gmail setup that’s coming up next.

STEP 3: GMAIL
All of the high level detail is covered in the tutorial I linked before.
The only thing you need to keep an eye out for is the SMTP settings.
In the screenshot above, Resend uses a default port of 465. I recommend keeping it simple and using the Gmail default of 587. And of course, use your API key as the password.
It should look like this: 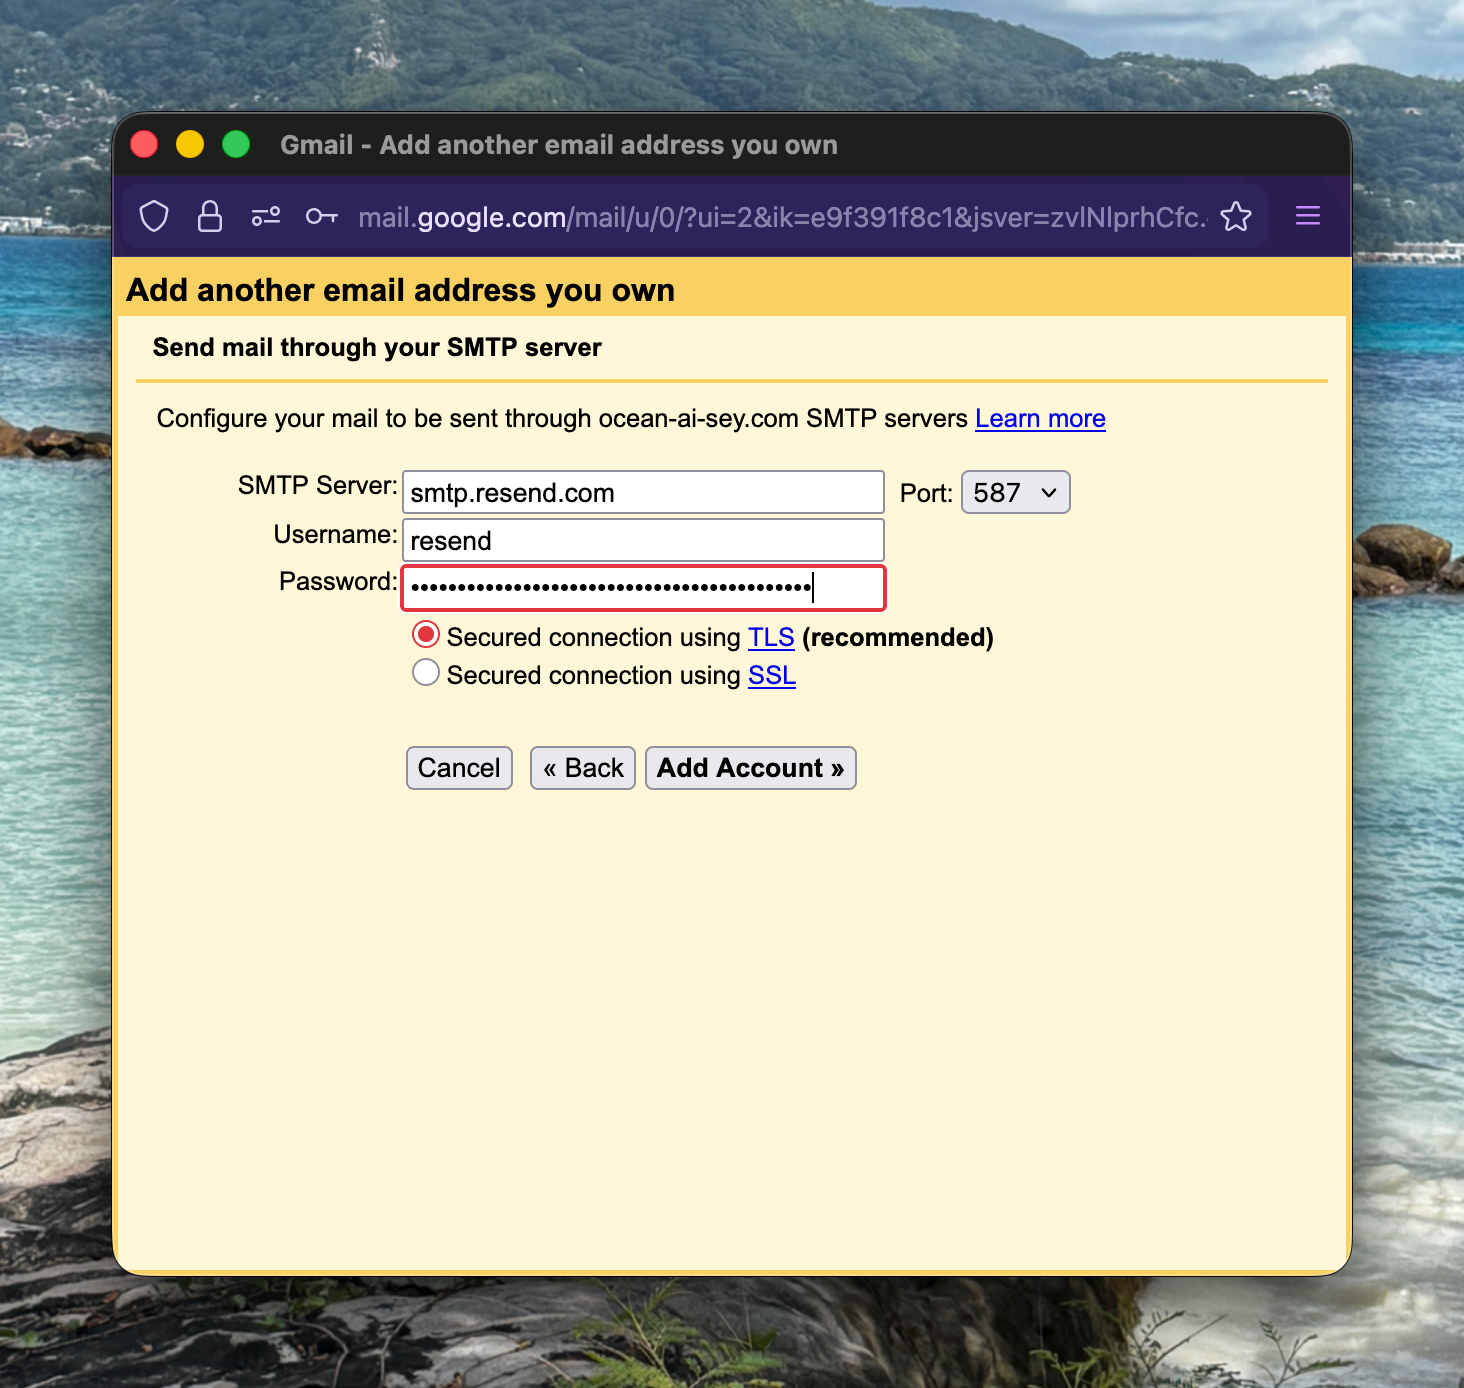
Once you proceed from here, you’ll be asked to confirm your email address.
Since receiver routing is already set up through Cloudflare, the confirmation email will land in your personal inbox.
At that point, you just need to follow the advice in Google’s tutorial to ensure you send from your custom address when composing an email. You can also set it to automatically use your custom address when replying to an email sent to that address. It’s also possible to set it up so that your custom domain becomes your default sending address when you compose an email. This is only advisable if you don’t plan to use your normal Gmail address (e.g. guy123@gmail.com) for correspondence.
And there you have it.
100% free, professional, clean email routing to and from your custom domain, working right out of Gmail, as you know and love it 😎